How to Catch More Fish With a Fish Finder
Ever feel like you’re just cruising around aimlessly on the lake, casting blind, or drilling hole after hole on the ice hoping to stumble upon fish? It’s a frustrating feeling many Minnesota anglers know all too well. This guide is here to transform your fishing experience by showing you how to truly leverage your fish finder, turning it from a simple depth gauge into a powerful fish-locating tool that puts more walleye, bass, and panfish in your boat or on your ice.
Understanding the Basics: More Than Just Depth
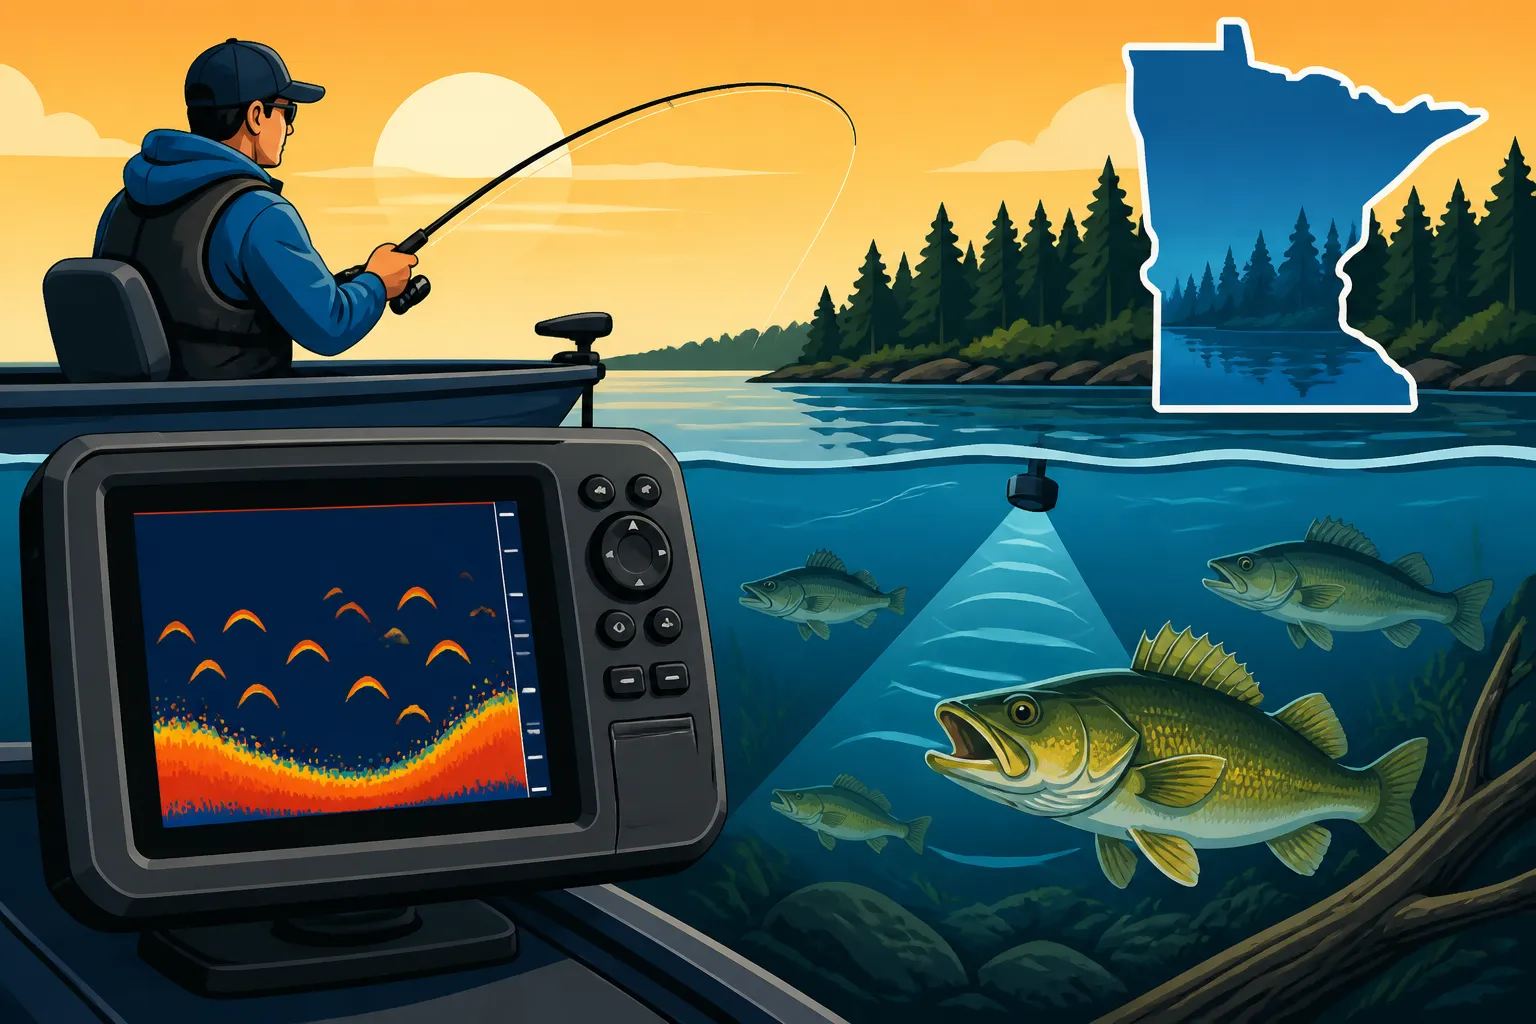
A fish finder, at its core, is a sonar device. It sends out sound waves, waits for them to bounce off objects (like the bottom, fish, or submerged structures), and then listens for the echoes. The time it takes for those echoes to return tells the unit how far away the objects are. But understanding what those squiggly lines and colorful blobs on your screen actually mean is the real key to success. It's not just about knowing the depth; it's about interpreting the underwater world your transducer is painting for you.
Interpreting Sonar Readings for Structure
One of the most powerful aspects of a fish finder is its ability to reveal hidden underwater structure. Fish are creatures of habit and often relate directly to structure for cover, ambush points, or temperature regulation. A soft, mucky bottom will show up as a wider, often less intense line on your screen, indicating that the sonar signal is being absorbed more. Conversely, a hard bottom — think rock piles, gravel, or even submerged timber — will reflect the sound waves more efficiently, appearing as a thinner, more intense, and sometimes doubled line.
Imagine you're cruising over a flat, featureless bottom, and suddenly, your screen shows the bottom line rising sharply, then dropping again, indicating a hump. Or perhaps you see a distinct edge where the bottom plunges from 10 feet to 25 feet – that's a classic drop-off, a prime location for hungry walleyes. Weed lines, which are often overlooked visual cues, can also be identified as denser, often taller growths rising from the bottom. These types of structure are crucial for understanding Where Do Walleye Live in a Lake? (Structure) and other species. Learning to recognize these subtle differences on your screen allows you to pinpoint potential holding areas for fish, even if you don't see fish arches directly on them.
Identifying Fish Arches and Marks
Ah, the coveted fish arch! This is what most new fish finder users are hunting for, and for good reason. When a fish passes through the cone of your sonar signal, the sound waves reflect off it at various points as it enters, passes through, and exits the cone. This creates the characteristic arc shape on your screen. A full, strong arch usually indicates a fish that passed directly under the transducer. Smaller, partial arches or even just distinct lines or blobs can still represent fish, especially if they are on the edge of the cone or moving quickly.
The size and thickness of the arch can give you clues about the size of the fish. A thick, long arch often means a larger fish, while smaller, thinner arches usually indicate smaller fish or baitfish. It’s important to remember that fish don’t always appear as perfect arches; sometimes they'll show up as vertical lines if they are stationary directly under your transducer (common in ice fishing, which we talk about in How to Find Fish While Ice Fishing). If you see a dense cluster of small arches or lines, that's likely a bait ball, and where there's bait, predatory fish are often not far behind. Experiment with your sensitivity settings to ensure you’re picking up both subtle marks and clear arches without too much clutter.
Fine-Tuning Your Fish Finder Settings
Your fish finder is a sophisticated piece of equipment, and simply turning it on isn't enough to unlock its full potential. The default settings are a good starting point, but truly maximizing its effectiveness means diving into the menu and adjusting parameters to suit the specific conditions you're fishing in. This is where many anglers miss out, leaving valuable information on the digital table.
Adjusting Sensitivity and Gain
The sensitivity, or gain, setting is arguably the most critical adjustment on your fish finder. It controls how much detail your unit picks up. Think of it like the volume knob on a radio – too low, and you'll miss the broadcast (fish); too high, and you'll get static (screen clutter). The goal is to find that sweet spot where you're seeing as much detail as possible, including faint fish marks and subtle structure, without your screen becoming unreadable with noise.
When fishing in clear, shallow water, you might need to lower your sensitivity to avoid picking up too much suspended particulate matter or even bubbles from your boat's prop wash. Conversely, in deeper water or murkier conditions, you'll often need to crank up the sensitivity to ensure the weaker echoes from distant fish or bottom structure are still registered. A good rule of thumb is to increase the sensitivity until you start seeing a little clutter, then back it down just enough to clean up the screen. Practice this regularly, and you'll quickly develop an intuition for what looks "right" on your screen, letting you discern fish from phantom signals.
Optimizing Frequency and Cone Angle
Most modern fish finders, whether from brands like Humminbird, Lowrance, or Garmin, offer multiple frequencies, typically 200 kHz (high frequency) and 50 kHz or 83 kHz (low frequency). Choosing the right frequency can significantly impact what you see. The 200 kHz setting uses a narrower cone angle, providing excellent detail and target separation, making it ideal for shallow to medium depths (say, up to 100 feet) and for identifying individual fish or tightly packed schools. It's your go-to for precise readings.
The lower frequencies (50 kHz or 83 kHz) emit a wider cone angle. This broader beam covers a much larger area, which is fantastic for searching large expanses of water or for penetrating greater depths where the 200 kHz signal might weaken too much. The trade-off is less detail and target separation. Many anglers will use a split-screen view, running both frequencies simultaneously to get both a broad overview and a detailed look at specific targets. For example, use the wide cone to find a large school, then switch to or zoom in on the narrow cone to pick out individual fish within that school.
Utilizing Zoom and Split-Screen Views
Don't underestimate the power of the zoom feature. When fish are hugging the bottom, they can be incredibly difficult to distinguish from the bottom contour, especially on a cluttered screen. The zoom function allows you to magnify a specific section of the water column, often the bottom 5-10 feet, making those bottom-hugging walleyes or crappies much more apparent. This can be a game-changer when you know fish are tight to structure.
Split-screen views are another powerful tool, allowing you to display multiple types of information simultaneously. A common and highly effective setup is to combine your traditional 2D sonar view with a GPS mapping screen. This allows you to see the fish and structure directly under your boat while simultaneously viewing your boat's position on a detailed lake map. This linkage is crucial for understanding how fish relate to specific contours or transitions you've marked on your map. Advanced units, particularly those with technologies like How to Use Garmin LiveScope for Walleye or Humminbird's Mega Live, can also split-screen live sonar with traditional views, providing even more comprehensive situational awareness. You can explore a wide range of devices offering these functionalities on platforms like Amazon.
Advanced Strategies for Locating Fish
Once you’ve mastered the basic settings, it’s time to move beyond simply seeing "blips" and start applying your fish finder intelligence to specific angling goals. This is where your electronics truly become an extension of your fishing brain, helping you strategize rather than just react.
Matching Fish Finder Intel to Your Target Species
Different fish species behave differently, and your fish finder can help you confirm those behaviors. For instance, walleyes are often found tight to the bottom, especially during the day, so you'll be looking for those characteristic arches directly on or slightly above the bottom line. If you see them suspended, they might be actively feeding or chasing bait. Conversely, crappies and other panfish are well-known for schooling up and suspending in the middle of the water column, sometimes over deep basins, and they’ll show up as dense clouds of smaller arches or marks. Learning these patterns helps you interpret what you're seeing. For a deeper dive into techniques, you might check out Walleye Fishing Techniques: Complete Minnesota Guide or Crappie & Panfish Fishing Techniques.
Northern pike, another popular Minnesota target, often relate to weed edges, submerged timber, or sharp drop-offs. While a fish finder can show you the presence of these structures, often a large, solitary arch hovering near a dense weed line shown on your sonar is a dead giveaway for a pike. Knowing the typical depths, structures, and schooling habits of species helps you decipher your screen more effectively. Understanding Northern Pike in Minnesota: Identification & Where to Catch and their habits can significantly improve your success with the help of your electronics.
Combining Sonar with GPS Mapping
This is perhaps the most significant leap you can make in fish finder utilization. Seeing fish or structure is one thing; being able to mark that exact spot, return to it, and find similar locations is another entirely. Modern fish finders are almost universally paired with GPS capabilities and come pre-loaded with detailed lake maps, or allow you to upload map cards from companies like Navionics or LakeMaster. These detailed maps show contour lines, depth changes, submerged islands, and other features that are fish magnets. Many anglers find these map cards, which offer incredible detail for Minnesota's vast network of lakes and rivers, readily available on Amazon. For specific recommendations, check out Best GPS Lake Maps for Minnesota (Navionics, LakeMaster).
When your sonar shows a promising brush pile or a school of walleye on a deep break, immediately mark a waypoint. Now you can return to that spot with pinpoint accuracy. Furthermore, by observing your boat’s position on the map alongside your sonar readings, you can identify patterns. If you find fish on a particular depth contour on one side of the lake, you can then use your map to locate similar contours on other parts of the lake and explore those areas. This combination transforms random searching into systematic, pattern-based fishing, drastically increasing your efficiency.
Using Advanced Sonar Technologies
The world of fish finders has evolved rapidly, and while 2D sonar remains the foundation, advanced technologies offer even more insight. Down Imaging (sometimes called DownVu or DownScan) provides a photographic-like view directly beneath your boat, making it easier to identify submerged trees, rock piles, or even individual fish relating to structure with incredible clarity. Side Imaging (SideVu or SideScan) takes this a step further, scanning out to the sides of your boat, revealing structure and fish that you might otherwise cruise right past. This is especially useful for quickly covering large flats or scouting weed lines.
Then there's the revolutionary live sonar, popularized by systems like Garmin LiveScope and Humminbird Mega Live. These forward-facing and perspective-mode transducers allow you to see fish and even your lure in real-time, in front, below, or to the sides of your boat. Imagine watching a walleye swim towards your jig! While these units represent a significant investment, they offer an unparalleled view of the underwater world and can be incredibly effective for targeting specific fish, as detailed in articles like How to Use Garmin LiveScope for Walleye and Is Garmin LiveScope Worth It for Walleye?. Even if you don't own these top-tier systems, understanding their capabilities can help you appreciate how far fish finder technology has come and how much information is truly available to savvy anglers.
Common Fish Finder Mistakes and How to Avoid Them
Even with the best technology at your fingertips, it’s easy to fall into traps that hinder, rather than help, your fishing success. Avoiding these common mistakes is as crucial as understanding how to use the unit itself. It's about developing good habits and recognizing the limitations, as well as the strengths, of your electronics.
Over-Reliance on "Fish Arches" Alone
Many novice anglers fixate solely on seeing those perfect fish arches and assume that if there are no arches, there are no fish. This is a significant pitfall. Sometimes, what looks like a fish arch could be debris, a thermocline (a layer of water with a sharp temperature change), or even air bubbles. More importantly, fish don't always appear as distinct arches. They might be too close to the bottom to separate from the contour, too small, or simply on the very edge of your sonar cone.
Instead of just looking for arches, learn to interpret the entire picture. Look for baitfish schools – often appearing as dense clouds of dots. Observe changes in bottom composition, depth transitions, and submerged vegetation. Fish are almost always associated with something, whether it’s structure, bait, or specific water conditions. Your fish finder is showing you the whole ecosystem; don't just cherry-pick one detail. Understanding Seasonal Fishing Patterns in Minnesota can also help you anticipate where fish will be, giving you context for what your sonar shows.
Ignoring Your Lake Map and On-Water Clues
While your fish finder offers an incredible window into the underwater world, it's not a magic eight-ball. Staring exclusively at your screen can lead you to miss crucial on-water clues. The best anglers combine their electronics with traditional knowledge and observation. Are there loons diving repeatedly in a certain area? That often indicates baitfish. Is there a visible weed line that extends out from shore? Your map and sonar can help you follow it. Is there a sudden change in wind direction creating a current? Fish often react to those shifts.
Your detailed lake map, especially those from Navionics or LakeMaster, provides a bird's-eye view of the entire fishery. Use it to identify potential hotspots before you even turn on your sonar. Look for subtle humps, saddles between islands, points that drop into deep water, or areas where different types of bottom meet. Then, use your fish finder to confirm the presence of fish and fine-tune your approach on those promising spots. Think of your fish finder as a powerful magnifying glass, but your map is the atlas that guides your expedition. When buying one, whether it's a standalone GPS or a combo unit, remember that a wide selection is available on platforms like Amazon.
Not Practicing and Experimenting
Like any skill, truly mastering your fish finder takes practice and experimentation. You won't learn everything in one trip. Take the time to play with your settings in different conditions and different lakes. See how sensitivity changes what you perceive. Try different frequencies. Learn what different types of bottom look like on your specific unit. Every lake, every depth, and even different times of day can require slight adjustments to get the best picture.
Don't be afraid to make mistakes or to spend a few moments just observing your screen without casting a line. The more familiar you become with how your fish finder translates the underwater world, the better you'll be at finding fish. It's an ongoing learning process, but one that will pay dividends in more successful and enjoyable fishing trips here in Minnesota. For those just starting out, getting a reliable unit is key; you can find recommendations in Best Fish Finders & Electronics for Minnesota Fishing to kickstart your journey.
| Feature / Setting | Description | Best Use Cases |
|---|---|---|
| Sensitivity/Gain | Controls how weak or strong an echo signal the unit will display. | Adjust for clear/murky water, shallow/deep conditions. Increase for faint echoes, decrease for clutter. |
| Frequency (200 kHz) | High frequency, narrow cone. Provides detailed, precise images directly below. | Shallow to medium depths, identifying individual fish, target separation. |
| Frequency (50/83 kHz) | Low frequency, wide cone. Covers a broader area. | Deeper water, scouting large areas for schools, general bottom contour. |
| Zoom | Magnifies a specific portion of the water column. | Identifying fish tight to the bottom, seeing subtle structure details. |
| Split-Screen | Displays multiple views (e.g., 2D Sonar + GPS Map). | Combining fish finding with navigation, understanding fish-to-structure relationships. |
| Down Imaging | Photographic-like detail directly below the boat. | Clearly seeing submerged timber, rock piles, identifying species near structure. |
| Side Imaging | Scans wide areas to the left and right of the boat. | Quickly locating structure and fish off to the sides, scouting large flats. |
Disclaimer
The information provided in this guide is for general informational purposes only. Fishing regulations, techniques, and equipment recommendations can change. Always consult the latest Minnesota Department of Natural Resources (DNR) regulations and local authorities before fishing. Fishing conditions and success can vary greatly.