Best Fish Finders & Electronics for Minnesota Fishing
Alright, let's be real. Standing in an aisle at Bass Pro Shops, staring at a wall of fish finders, or endlessly scrolling through options on Amazon, can feel like you need a Ph.D. in marine electronics just to understand what you're looking at. It's overwhelming, expensive, and the jargon alone is enough to make you want to just stick to a bobber and a worm. But knowing what electronics truly make a difference in Minnesota's diverse waters can transform your fishing experience, and this guide is here to cut through the noise and help you navigate the world of fish finders and advanced electronics.
Why Fish Finders Are Essential for Minnesota Anglers
For anyone serious about consistently finding and catching fish in Minnesota, a fish finder isn't just a luxury anymore; it's a fundamental tool. Our lakes and rivers are vast, complex, and full of hidden structures, and relying solely on guesswork or old-school methods can often leave you frustrated and empty-handed. These sophisticated devices provide an invaluable window into the underwater world, showing you not just fish, but also the terrain they relate to, which is half the battle won.
The Advantage on Big Lakes
Think about fishing one of Minnesota's giants, like Mille Lacs Lake or Lake of the Woods. These aren't just puddles; they're inland seas with hundreds of square miles of water, varying depths, subtle breaks, and expansive mud flats. Without electronics, locating key features like rock piles, weed lines, or even specific baitfish schools would be an exercise in futility. A quality fish finder, especially one with robust GPS mapping capabilities, helps you pinpoint these sweet spots quickly and efficiently. You can spend more time actually fishing and less time aimlessly cruising. It turns a massive, intimidating body of water into a series of manageable, fishable locations, giving you the confidence to explore new areas and return to productive spots.
Cracking Seasonal Patterns
Fish patterns change drastically with the seasons here in Minnesota. What works on the Walleye Opener in May won't necessarily cut it in the heat of August or during late fall. In spring, walleyes might be shallow, relating to new weed growth or spawning areas, while in summer, they often move to deeper structure or thermoclines. A fish finder is absolutely critical for deciphering these movements. It allows you to see exactly what depth fish are holding at, how they're orienting to structure, and even the presence of baitfish, which is a huge clue. This real-time information helps you adapt your tactics and presentation, whether you're jigging for walleye, trolling crankbaits, or targeting suspended crappies. It provides the empirical data needed to confirm your theories or pivot when a spot isn't producing.
Understanding the Core Technologies: Sonar Basics
At the heart of every fish finder is sonar technology, which uses sound waves to "see" underwater. While the displays and features have evolved dramatically over the years, the basic principle remains the same: send out a sound wave, listen for the echo, and interpret what it means. Understanding these fundamentals helps you make sense of what you're seeing on your screen and, more importantly, how to use it to find more fish.
Traditional 2D Sonar Explained
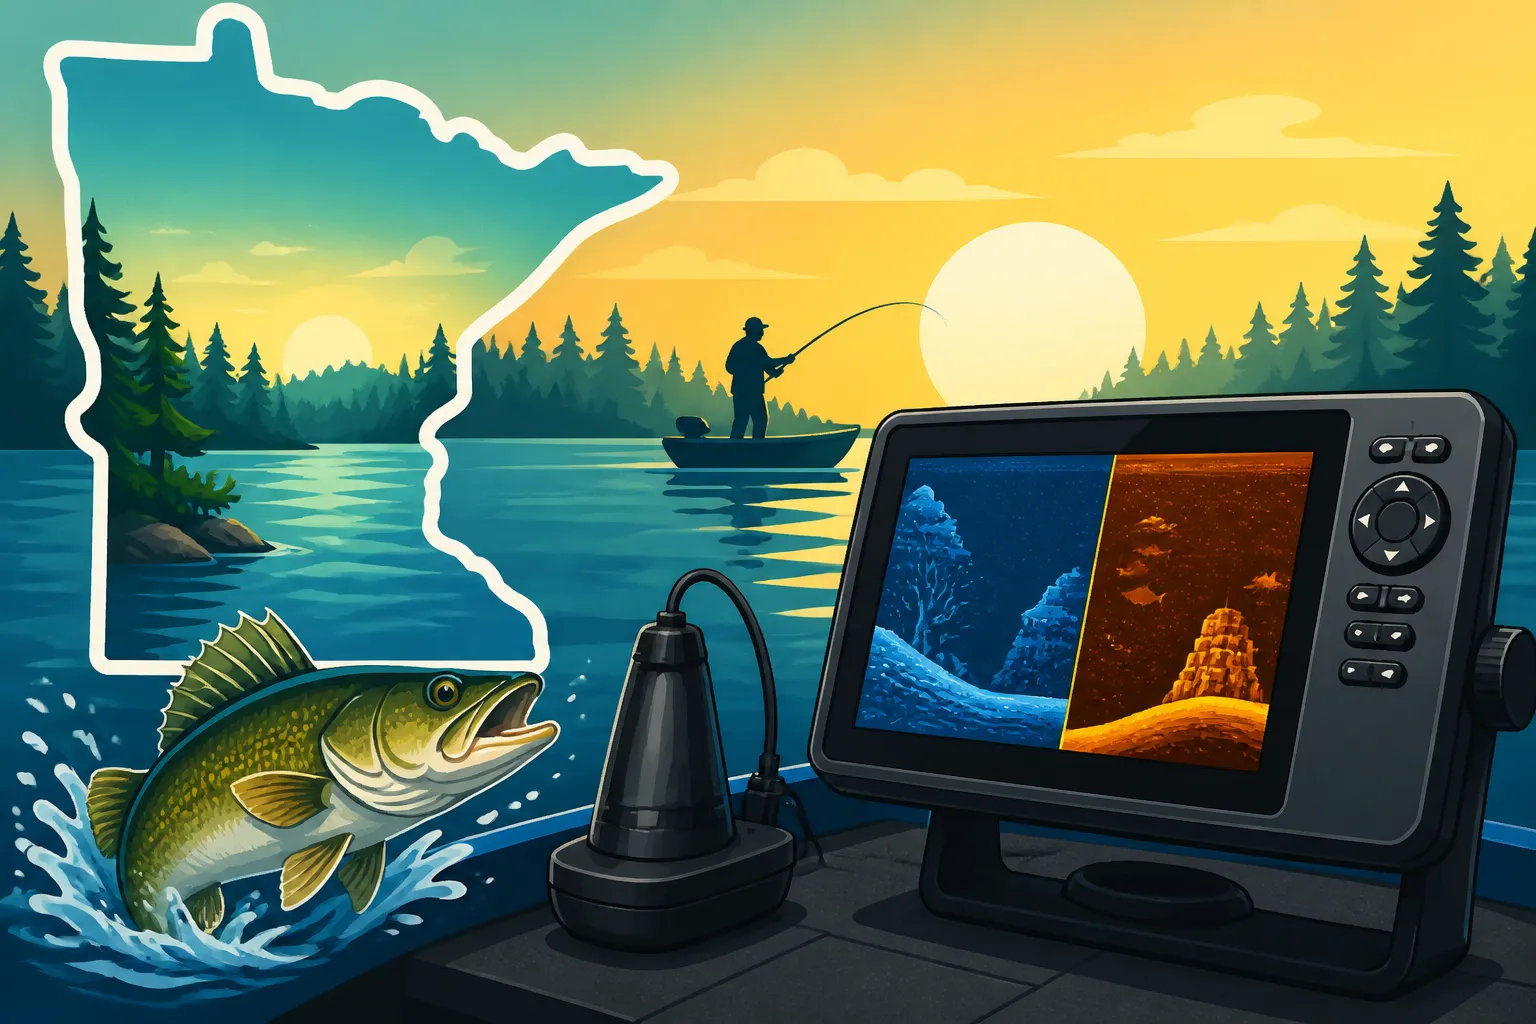
Traditional 2D sonar, often called broadband or CHIRP sonar, is the foundational technology that most anglers are familiar with. It sends a conical beam of sound waves straight down from your transducer. When these sound waves hit an object – like the lake bottom, a submerged log, or a fish – they bounce back to the transducer. The unit then interprets these echoes, showing them on your screen as arches (for fish), lines (for the bottom), or various shapes indicating structure. The strength and timing of the echo determine how it's depicted. Stronger echoes, like a large fish or dense bottom, appear brighter or thicker.
The beauty of 2D sonar is its simplicity and reliability, especially for identifying fish arches and bottom contours. On smaller bodies of water or when targeting fish directly beneath your boat, it's incredibly effective. You can easily see the depth, spot drop-offs, and identify schools of baitfish or individual larger fish. Learning to interpret the arches – their size, shape, and how they relate to the bottom – is a skill that comes with practice but forms the backbone of using any fish finder effectively. Many veteran anglers still swear by a good 2D display for its clarity and ability to show target separation.
Down Imaging and Side Imaging for Detailed Views
While 2D sonar is excellent for general depth and fish identification, Down Imaging (DI) and Side Imaging (SI) take things to a whole new level of detail, providing photographic-like views of the underwater world. These technologies use higher frequency, narrower beams to scan the water directly below (DI) or to the sides (SI) of your boat, creating incredibly clear, picture-like representations.
-
Down Imaging: Imagine pointing a waterproof camera straight down from your boat. That's essentially what Down Imaging simulates. It processes the sonar returns to render incredibly detailed images of structure directly beneath you. You can discern individual tree limbs on a submerged brush pile, the distinct shape of a rock pile, or even fish nestled tightly within cover. This level of detail is invaluable for precision fishing, allowing you to drop a jig directly onto a specific piece of structure or to a fish you've identified. It makes differentiating between a school of baitfish and a school of crappies much easier.
-
Side Imaging: Side Imaging, sometimes called SideVu by brands like Garmin, extends your underwater vision horizontally. Instead of just seeing what's directly beneath you, SI transducers send beams out to the sides, often up to 100-200 feet or more on each side, depending on the unit. This creates a panoramic view, allowing you to scan vast areas quickly. You can literally see a walleye holding off a breakline, a muskie cruising a weed edge, or a sunken boat, all without having to drive directly over them. For covering water on a big lake like Lake Vermilion or locating subtle offshore structure that might be hard to find with 2D alone, Side Imaging is a game-changer. It helps you find fish faster and understand their broader habitat, making your time on the water much more productive.
Advanced Sonar: Forward-Facing and Panoptix LiveScope
If traditional and even Down/Side Imaging sonar are like looking at an underwater photograph, then forward-facing sonar is like having an underwater live video camera. This revolutionary technology has truly reshaped how many anglers approach fishing, especially for targeting specific fish in real-time. It's often debated in fishing circles, but its effectiveness is undeniable.
The Game-Changer of Live Sonar
Live sonar systems, popularized by technologies like Garmin Panoptix LiveScope, Humminbird MEGA Live Imaging, and Lowrance ActiveTarget, have taken the fishing world by storm. Unlike traditional sonar that shows you what you've already passed over, live sonar projects a real-time, high-resolution image of the underwater world in front of, or around, your boat. You can literally watch your lure descend, see fish react to it, and adjust your presentation on the fly.
Imagine this: You're casting a jig towards a weed line on Leech Lake. With live sonar, you see your jig falling, you see a walleye sitting near the bottom, and you can watch that walleye move towards or away from your bait. If it ignores your jig, you can twitch it differently, change retrieval speed, or even swap lures and observe the immediate response. This instant feedback loop dramatically shortens the learning curve and allows for incredibly precise and effective fishing, especially for targeting individual fish or small schools. It's like having X-ray vision, giving you an unprecedented tactical advantage.
Practical Applications on Minnesota Waters
The applications of forward-facing sonar in Minnesota are vast and varied. For walleye anglers, it's incredible for dissecting weed lines, finding transition areas, or picking off suspended fish over deep water. On Upper Red Lake, it helps locate schools of crappies relating to subtle changes in the flat bottom. Bass anglers use it to target individual fish holding tight to docks, fallen timber, or rock piles on lakes like Minnetonka.
Consider ice fishing: while traditional flashers are still kings, some anglers are now adapting live sonar for stationary ice fishing. You can scan around your hole, see fish approaching from a distance, and know exactly when to brace for a bite. This is particularly useful for finding those roaming schools of perch or suspended crappies. The ability to see beyond your immediate vicinity, especially in complex structures or open water, is what makes live sonar so powerful. It empowers you to not just find fish, but to engage with them in a way that was previously impossible, making for some truly exciting and productive fishing adventures.
Key Features to Look for in a Fish Finder
Choosing the right fish finder isn't just about picking the newest, most expensive model. It's about matching the features to your specific fishing style, the types of waters you fish in Minnesota, and, of course, your budget. There are several core features that differentiate units and significantly impact their performance and utility on the water.
Screen Size and Resolution
This might seem obvious, but screen size and resolution are paramount for comfortable and effective use. A larger screen, generally 7 inches or more, provides much more real estate to display multiple sonar views simultaneously – for instance, 2D, Down Imaging, and a GPS map all at once. This multi-pane view is incredibly helpful for understanding the full underwater picture. A higher resolution, measured in pixels (e.g., 800×480, 1024×768), means crisper, clearer images with more detail.
Imagine trying to decipher subtle weed lines or individual fish targets on a small, low-resolution screen while dealing with glare and boat bounce. It's frustrating! A larger, high-res display from brands like Humminbird or Lowrance makes reading your sonar much easier, reducing eye strain and increasing your ability to interpret information accurately. For serious anglers who spend long hours on the water, investing in a good screen is a wise decision. You'll be able to quickly glance at your unit and understand what's happening beneath and around your boat, leading to faster decisions and more hooked fish.
GPS Mapping and Lake Charts (Navionics, LakeMaster)
For navigating Minnesota's vast and often unmarked lakes, integrated GPS mapping is not just a convenience; it's a necessity. A fish finder with GPS allows you to mark waypoints for productive spots, follow specific contour lines, and safely navigate back to shore. But it's the quality of the built-in or compatible lake charts that truly elevates this feature.
Brands like Garmin, Humminbird, and Lowrance offer incredible detailed mapping options, often compatible with charts from providers like Navionics or LakeMaster. These premium charts provide highly detailed contour lines, indicating depth changes, drop-offs, humps, and even areas of submerged vegetation.
- Navionics: Widely popular, Navionics charts cover a massive number of lakes and frequently update their SonarChart™ layer, which uses sonar logs from users to create even more detailed 1-foot contours. This community-driven data can be incredibly precise.
- LakeMaster: Humminbird's exclusive LakeMaster charts are renowned for their accuracy and unique features like "Depth Highlight" and "Shallow Water Highlight," which allow you to color-code specific depth ranges. This is fantastic for quickly identifying fishing zones, especially when targeting fish at specific depths like when pursuing crappie and sunfish limits.
Having accurate mapping means you can pre-plan your fishing trips, find structure even if you've never been to a lake, and navigate safely in unfamiliar waters, giving you a huge leg up in a new spot.
Transducer Quality and Power
The transducer is the unsung hero of your fish finder system. It's the part that actually sends and receives the sonar waves, and its quality directly impacts the clarity and detail of what you see on your screen. Don't skimp here! A powerful transducer, typically measured in wattage (RMS), can penetrate deeper water and provide clearer returns, especially in noisy environments or murky water.
Beyond power, the frequency and cone angle of the transducer are also crucial.
- High Frequencies (e.g., 200 kHz, MEGA Imaging's 1.2 MHz): These provide finer detail and better target separation, ideal for identifying individual fish and subtle structure. They don't penetrate as deep, making them excellent for shallower to moderate depths.
- Low Frequencies (e.g., 50 kHz, 83 kHz): These penetrate deeper water more effectively, making them good for deep-water fishing but with less detail.
- CHIRP (Compressed High-Intensity Radiated Pulse): Many modern transducers use CHIRP technology, which sweeps a range of frequencies instead of just one. This results in much clearer, more detailed, and less noisy images, dramatically improving target separation and depth penetration compared to traditional single-frequency transducers.
When buying a unit, pay close attention to the included transducer. Sometimes a cheaper unit comes with a basic transducer that won't unlock the full potential of its sonar capabilities. Upgrading to a more advanced transducer from Airmar or the brand's premium offerings can make a world of difference in the performance of your system.
Top Brands and Models for Minnesota Anglers
When it comes to fish finders and marine electronics, a few key brands consistently lead the pack, offering a range of options from entry-level units to professional-grade systems. Each brand has its loyal following and unique strengths, making the choice often a matter of personal preference and specific feature requirements. Knowing what each offers can help you decide which ecosystem best suits your Minnesota fishing adventures.
Garmin: ECHOMAP and LiveScope Systems
Garmin has really pushed the boundaries of marine electronics, particularly with its groundbreaking Panoptix LiveScope technology. Their units are known for user-friendly interfaces, robust GPS capabilities, and incredibly detailed mapping.
-
Garmin ECHOMAP Series: These are fantastic all-around units for the recreational angler. The ECHOMAP UHD and Ultra series offer bright, sunlight-readable displays, excellent traditional CHIRP sonar, and DownVu/SideVu (Garmin's equivalent of Down Imaging and Side Imaging). What truly sets them apart is their strong GPS performance and preloaded LakeVü g3 charts, which are highly detailed for many Minnesota lakes. They are also easily upgradeable to include LiveScope, making them a great starting point for those who might want to add live sonar later. These units are often favored for their intuitive menus and seamless integration of all features. For many, an ECHOMAP Ultra 106sv is the sweet spot, offering a large screen and all the necessary tech without breaking the bank.
-
Garmin LiveScope System: This is where Garmin truly shines. Their LiveScope transducer and black box module provide real-time, forward-facing and down-facing sonar that has revolutionized how anglers find and catch fish. The ability to watch fish react to your lure, even under the ice, is an unprecedented advantage. While an investment, many anglers on larger walleye lakes or targeting specific bass structures find it indispensable. You'll often see these paired with a high-end ECHOMAP Ultra or even a more powerful GPSMAP series display for maximum screen real estate. If you're looking into Garmin LiveScope Review: Is Forward-Facing Sonar Worth It?, you'll find overwhelming evidence of its effectiveness from serious anglers.
Humminbird: HELIX and MEGA Imaging
Humminbird has long been a favorite among serious anglers, particularly those chasing walleye and muskie, thanks to their industry-leading MEGA Imaging technology and their exclusive LakeMaster mapping.
-
Humminbird HELIX Series: The HELIX line is a staple in many Minnesota boats. These units offer exceptional screen clarity and powerful traditional sonar. However, their true advantage lies in Humminbird's proprietary MEGA Imaging (MEGA Down Imaging and MEGA Side Imaging). This technology operates at megahertz frequencies, providing unparalleled detail and clarity in side and down views. You can literally count the blades on a prop from a sunken motor or identify specific types of weeds. For anglers who rely heavily on detailed structure interpretation, the MEGA Imaging units, especially the HELIX 9, 10, or 12 G4N models, are top contenders.
-
Humminbird MEGA Live Imaging: Similar to Garmin's LiveScope, Humminbird offers its own real-time, forward-facing sonar system called MEGA Live Imaging. It integrates seamlessly with HELIX and SOLIX units, offering incredible detail and clarity, allowing you to see fish, structure, and your lure in real-time. Paired with the highly detailed LakeMaster charts, a Humminbird system can provide a powerful and comprehensive view of your fishing environment. The clarity of MEGA Side Imaging for finding those fish relating to sparse cover or deep breaks on a lake like Lake of the Woods is truly unmatched by other brands.
Lowrance: Elite FS and HDS LIVE
Lowrance has a rich history in marine electronics, and their current offerings continue to impress with their powerful sonar, robust networking capabilities, and innovative features.
-
Lowrance Elite FS Series: These units offer a fantastic blend of performance and value. They include excellent CHIRP sonar, DownScan (their Down Imaging), and StructureScan (their Side Imaging) capabilities. A key strength of the Elite FS is its ability to integrate with ActiveTarget Live Sonar, making it a highly versatile system. The touchscreens are responsive, and they're known for intuitive menu navigation. For a solid all-around performer that can be expanded with live sonar, an Elite FS 9 or 12 is a strong contender.
-
Lowrance HDS LIVE Series: Stepping up to the HDS LIVE series brings professional-grade features, enhanced processing power, and even more advanced networking options. These units are favored by tournament anglers and those who demand the absolute best in sonar performance. They offer superior screen resolution, faster redraw rates, and more customization options. The HDS LIVE units are designed to be the central hub of a boat's electronics, easily integrating with radar, autopilots, and multiple sonar sources, including their impressive ActiveTarget Live Sonar. ActiveTarget is another excellent live sonar system that provides crisp, real-time views, competing directly with Garmin's LiveScope and Humminbird's MEGA Live. Lowrance also offers excellent C-MAP charting, which includes many Minnesota lakes with high detail.
Here's a quick comparison of some popular series across the brands:
| Feature/Brand | Garmin ECHOMAP UHD/Ultra | Humminbird HELIX G4N | Lowrance Elite FS |
|---|---|---|---|
| Target User | Recreational to Advanced | Recreational to Advanced | Recreational to Advanced |
| Screen Sizes | 7", 9", 10", 12" | 7", 8", 9", 10", 12", 15" | 7", 9", 12" |
| Core Sonar | CHIRP, ClearVu, SideVu | CHIRP, MEGA DI, MEGA SI | CHIRP, DownScan, StructureScan |
| Live Sonar Comp. | Panoptix LiveScope | MEGA Live Imaging | ActiveTarget Live Sonar |
| Mapping | LakeVü g3 (preloaded) | LakeMaster (premium) | C-MAP (preloaded/premium) |
| Interface | Button/Touch combo | Button/Touch combo | Touchscreen primary |
| Networking | Basic to Advanced | Basic to Advanced | Basic to Advanced |
| Price Point | Mid-Range to High | Mid-Range to High | Mid-Range to High |
Note: All brands offer various models within these series, with specific features and price points. Always check the latest specifications.
Special Considerations for Ice Fishing Electronics
Ice fishing in Minnesota is a way of life, and just like open water, electronics have transformed the sport. The challenges of ice fishing – drilling multiple holes, moving frequently, and fishing in a small, concentrated area – demand a slightly different approach to your electronics setup. While some open-water units can be adapted, dedicated ice fishing electronics offer distinct advantages.
Flashers vs. Digital Sonar Units on Ice
The debate between traditional flashers and modern digital sonar units is a hot topic among ice anglers. Both have their strengths, and many anglers use a combination.
-
Flashers (e.g., Vexilar FLX-28, MarCum VX-1i, Humminbird ICE 35): These are the OGs of ice fishing electronics. A flasher provides a real-time, instantaneous display of what's directly below your hole, using a rotating colored dial. The different colors indicate the strength of the sonar return – typically green for weak, orange for medium, and red for strong. You can see your jig descending, fish approaching it, and the lake bottom, all in a flicker of an eye. The key advantages are their incredible speed (no lag whatsoever), rugged durability, and simplicity. They excel at showing subtle fish movements and how fish react to your bait, making them perfect for precise jigging. Many anglers find the raw, unfiltered data of a flasher to be superior for sensing a fish's mood. If you want to really dive into this, check out How to Read a Flasher (Vexilar/Humminbird).
-
Digital Sonar Units (e.g., Humminbird ICE HELIX Series, Garmin ECHOMAP Ice Fishing Bundles): These are essentially open-water fish finders adapted for ice use. They display the sonar returns on a traditional LCD screen, often with a "flasher mode" that mimics the circular display of a traditional flasher. Their main advantages include:
- Versatility: Many can be easily converted for open-water use in summer, offering more bang for your buck.
- Mapping: Most digital units include GPS and detailed lake maps, allowing you to mark holes, structure, and navigate safely on the ice. This is a huge benefit for finding specific humps or breaks.
- Advanced Features: Some models offer zoom, target separation, and even recording capabilities. The Humminbird Ice Helix Review showcases how these units bring powerful technology to the hard water.
For many, a flasher remains the go-to for its raw speed and precision for jigging, while a digital unit is preferred for mapping and wider area scanning.
Portable Ice Fishing Bundles
Manufacturers understand that ice anglers need mobility. That's why most top brands offer portable ice fishing bundles, which typically include:
- The Fish Finder Unit: Often a compact version of their open-water units or a dedicated ice flasher.
- An Ice Transducer: Specifically designed to be dropped down an ice hole, often weighted for stability.
- A Battery and Charger: Usually a 12V lead-acid or lithium battery to power the unit all day.
- A Portable Bag or Shuttle: This keeps everything organized, protected, and easy to carry from hole to hole. Brands like Clam, Otter, and even Bass Pro Shops offer excellent shuttles and bags.
These bundles are fantastic because they provide a complete, ready-to-go system. They're designed for easy setup and breakdown, crucial when you're hopping between holes trying to find active fish. Many anglers will pair a high-quality portable unit, perhaps with a Vexilar FLX-28 Review in mind, with a sturdy ice fishing sled and a comfortable bucket, making for a highly efficient setup for chasing panfish or walleyes across a frozen lake. When considering Ice Fishing in Minnesota: Complete Beginner-to-Pro Guide, having a solid portable bundle is an absolute must-have.
Installation and Setup Tips
Getting your fish finder properly installed and set up is just as important as choosing the right unit. A poorly installed transducer or incorrectly configured settings can render even the most expensive unit useless. Taking the time to do it right will ensure you get the best possible performance on Minnesota's waters.
Transducer Placement and Wiring
The transducer is the "eyes and ears" of your fish finder, so its placement is critical for clear, uninterrupted sonar signals. For open water boats, common placement options include:
-
Transom Mount: The most common and easiest to install. The transducer mounts on the transom of the boat, just below the waterline. The key is to ensure it's in clean, undisturbed water, away from prop wash, strakes, or anything that creates turbulence. Even a small bubble stream can degrade your signal. Anglers often spend time adjusting the angle and depth to find the "sweet spot" that provides clear readings at all speeds. Make sure it's level with the boat's bottom and deep enough to stay submerged when the boat is on plane.
-
Thru-Hull Mount: For more permanent installations, especially on larger boats or those with fiberglass hulls, a thru-hull transducer is drilled directly through the hull. This provides the cleanest signal but is a more involved installation, often requiring professional help.
-
Inside-Hull Mount (Shoot-Thru): Some transducers can "shoot through" a fiberglass hull from the inside, mounted directly to the hull with epoxy. This is less invasive than thru-hull but typically results in some signal loss, making it less ideal for high-performance units or very deep water.
-
Trolling Motor Mount: Many anglers mount a dedicated transducer to their trolling motor, providing clean readings and the ability to point the sonar beam where the trolling motor is pointing, which is especially useful with forward-facing sonar. This is often the cleanest solution for Best Trolling Motors: Minn Kota Buyer's Guide setups.
Wiring is equally important. Run transducer cables away from power lines, VHF radio cables, or other electrical interference sources to prevent noise on your screen. Use marine-grade connectors, seal all connections, and secure cables properly to prevent damage or accidental disconnection. A clean installation equals a clean signal!
Optimizing Settings for Different Conditions
Once installed, your fish finder won't automatically be optimized for every fishing scenario. Learning to adjust its settings is key to getting the most out of it, whether you're targeting shallow crappies on a calm morning or deep walleyes in a choppy afternoon.
- Sensitivity/Gain: This controls how much detail your unit displays. Too low, and you'll miss fish and structure; too high, and your screen will be cluttered with noise. Start around 70-80% and adjust as needed. In clear water, you might run higher; in murky water with lots of debris, you might lower it slightly.
- Zoom: Use the zoom function to magnify a specific depth range, which is incredibly useful for target separation when fish are tight to the bottom or for precisely placing your lure.
- Depth Range: Set your depth range appropriately. If you're fishing in 15 feet of water, setting the range to 100 feet will make everything appear tiny and hard to read.
- Frequency: Experiment with different sonar frequencies (if your unit allows). Higher frequencies give better detail in shallower water, while lower frequencies penetrate deeper. CHIRP sonar automatically sweeps frequencies, offering the best of both worlds.
- Surface Clutter/Noise Rejection: These filters help reduce interference from the surface (like waves or boat wake) or electrical noise, giving you a cleaner image.
- Color Palette: Many units offer various color palettes. Choose one that provides the best contrast and visibility for your eyes and ambient light conditions.
Don't be afraid to tinker with these settings! Every lake, every boat, and every day on the water can present different conditions. The more you experiment and understand how each setting affects your display, the better you'll become at interpreting what your fish finder is telling you. This hands-on learning is truly the best way to master your electronics.
Maximizing Your Investment: Learning and Practice
Purchasing a sophisticated fish finder system is a significant investment, but simply owning one isn't enough. To truly maximize its potential and transform your fishing success on Minnesota's waters, you need to commit to learning how to use it effectively and practicing those skills consistently. It’s not a magic bullet, but a powerful tool in the hands of an informed angler.
Reading Your Sonar Like a Pro
The display on your fish finder isn't always a crystal-clear image of what's beneath. Often, it's a series of arches, lines, and blotches that require interpretation. Becoming proficient at reading your sonar takes time, but it's one of the most rewarding skills you can develop.
- Fish Arches: On traditional 2D sonar, a solid, well-defined arch usually indicates a fish. The larger and more complete the arch, the larger the fish or the longer it stayed in the sonar cone. Partial arches or "hooks" might be fish on the edge of the cone or smaller fish. Learn to differentiate between baitfish schools (often appearing as dense clouds or clumps) and individual larger fish.
- Bottom Composition: Pay attention to the thickness and color of the bottom return. A hard bottom (rock, gravel) will typically show a thicker, brighter return, sometimes with a "double echo." A soft bottom (mud, silt) will appear thinner and less intense. This helps you identify prime areas where walleyes might ambush bait or bass might relate to a firm transition line.
- Structure: Submerged trees, brush piles, rock formations, and even subtle ripples on a sand flat will all have distinct signatures. Down and Side Imaging are phenomenal for this, providing almost photographic detail. Learning these signatures helps you understand where fish might be hiding. Check out our guide on Where Do Walleye Live in a Lake? (Structure) to better understand how fish relate to these features.
The best way to learn is to spend time on the water, observing what your screen shows and comparing it to what you know about the bottom (e.g., if you drift over a known rock pile, note how it looks on screen). Many units also have a simulator mode that lets you practice interpreting returns without being on the water.
Integrating with GPS and Lake Mapping
A modern fish finder's true power comes from the seamless integration of its sonar with its GPS and mapping capabilities. Don't treat them as separate tools; use them together to create a comprehensive understanding of the lake.
- Mark Waypoints: Every time you catch a fish, see a promising piece of structure, or locate a school of bait, mark a waypoint on your GPS. Over time, these waypoints will build a valuable map of productive areas on your favorite Minnesota lakes.
- Follow Contours: Use your detailed lake maps (like those from Navionics or LakeMaster) to follow specific depth contours, especially when trolling or drift fishing. This keeps your lure in the strike zone longer. For example, if you know walleyes are holding on a 20-foot breakline, use your GPS to follow that exact depth.
- Create Trails: Your unit will record your boat's track. Review these tracks to identify productive routes and avoid unproductive ones. This is especially helpful on large bodies of water like Lake of the Woods.
- Utilize Apps: Consider integrating with fishing apps like Fishbrain, which can add another layer of community-sourced data and catch logs to your personal knowledge base. While not directly a fish finder, Best Fishing Apps for Minnesota (Fishbrain, Navionics) can augment your electronic setup.
Learning to seamlessly switch between sonar views and mapping, marking waypoints on the fly, and understanding how underwater topography relates to fish location will elevate your fishing game significantly. The combination of seeing what's below and knowing exactly where you are and where you've been is the ultimate recipe for success. Don't forget that many retailers like Bass Pro Shops offer courses or seminars on using electronics, and YouTube is an invaluable resource for specific tips and tricks for your exact unit.
Disclaimer
The information provided in this guide is for general informational purposes only and is subject to change. Always consult the most current regulations and guidelines from the Minnesota Department of Natural Resources (MNDNR) before engaging in any fishing activities. Product specifications and availability for fish finders and electronics can vary, so it is recommended to verify details with manufacturers or retailers.