How to Use Garmin LiveScope for Walleye
One of the most persistent frustrations for any walleye angler is the unknown: what's actually happening beneath the surface? Traditional sonar gives us a glimpse, a history lesson of what we just passed over, but it rarely shows us the real-time drama of a walleye stalking a lure. This guide is dedicated to demystifying Garmin LiveScope, revealing how this groundbreaking technology can transform your walleye fishing in Minnesota, giving you an unprecedented live look into the underwater world.
What Exactly is Garmin LiveScope and Why It's a Game-Changer for Walleye
For years, anglers relied on traditional sonar, which, while effective, always felt a step behind. Garmin LiveScope fundamentally shifts that paradigm, offering a real-time, live-action view of fish and structure around your boat. It's not just a fancy gadget; it's an indispensable tool for understanding walleye behavior and dramatically improving your hook-up ratio, especially in Minnesota's diverse waters.
Beyond Traditional Sonar: The Real-Time Advantage
Let's talk about what we're used to. Your classic 2D sonar gives you a picture of what's directly beneath your boat, showing fish arches and bottom contours as you move. DownVü and SideVü sonar enhance this with photo-like clarity, depicting structure and fish to the sides and directly below. These are fantastic tools, no doubt, but they all provide a historical snapshot – you're seeing where the fish were or what you just passed.
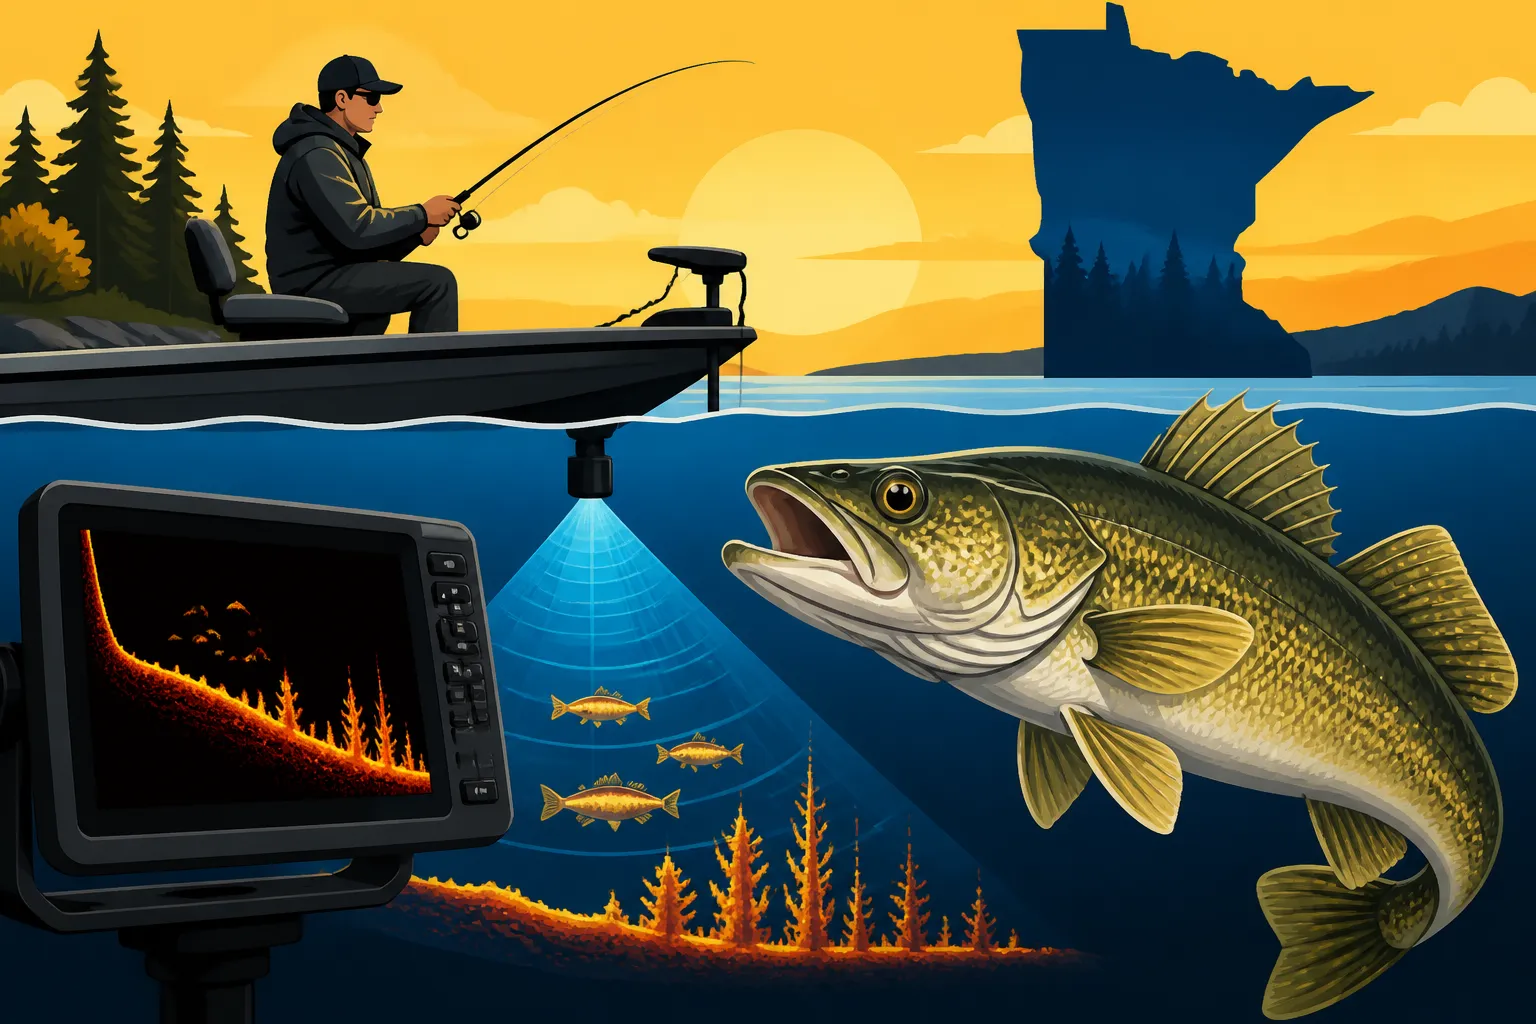
LiveScope, however, is like having an underwater camera with a wide, live-streaming lens. It projects a beam forward or downward, painting a real-time, moving picture on your screen. You see fish swimming, reacting to your bait, and interacting with structure as it happens. Imagine casting a jig and actually watching a walleye approach it, or seeing how it reacts to your retrieve. This isn't just about finding fish; it's about observing their mood, their path, and how they relate to the environment. For a species as notoriously finicky as the walleye, this real-time feedback is an absolute game-changer. It takes the guesswork out of presentation and allows for immediate adjustments, turning near misses into solid hook-sets.
Key Components of a LiveScope System
Getting into the LiveScope game requires a few core pieces of equipment working in harmony. It’s not just a standalone unit; it’s a system designed for comprehensive underwater vision.
First, you'll need the Garmin GLS™ 10 sonar black box. This is the brain of the operation, processing the sonar signals from the transducer and sending the data to your display. It’s compact but powerful, handling the intricate real-time processing that makes LiveScope so revolutionary.
Next, and arguably the most crucial part, is the LiveScope transducer. Currently, the popular options for freshwater anglers often include the LVS32, LVS34, or the LVS62. The LVS32 was the original, offering impressive clarity. The LVS34, an upgrade, provides even better resolution, target separation, and a slightly wider beam, making it easier to see more of the underwater world. The LVS62 offers even greater range and clarity, especially beneficial for deeper water or covering more ground. Each transducer comes with the capability for multiple modes:
- LiveScope Forward: This mode shows you what's ahead of your boat, scanning a wide area in front, perfect for scouting and long casts.
- LiveScope Down: This mode shows you what's directly below your boat, with incredible detail, ideal for vertical jigging or holding over a spot.
- Perspective Mode: Available with specific mounts, this gives you a top-down, wide-angle view of what’s in front of your boat, like an overhead map of the immediate fishing zone.
Finally, you need a compatible Garmin chartplotter. This is your display unit, where all that real-time sonar data comes to life. Popular choices among walleye anglers include the Garmin ECHOMAP™ Ultra series (like the 106sv or 126sv) or the GPSMAP® series (such as the 8610 or 8412). These units have powerful processors and vibrant displays capable of handling the high-definition LiveScope imagery without lag. When considering a setup, it’s often easiest to find bundles that include both the black box and transducer, and then pair it with your preferred chartplotter. You can often find a good selection of these components and systems, sometimes at competitive prices, on platforms like Amazon.
Setting Up Your LiveScope for Optimal Walleye Detection
You've got the gear, but simply slapping it on your boat isn't enough to unlock its full potential. Proper setup and calibration are absolutely critical for maximizing your walleye detection capabilities. It's about getting the transducer in the right spot and dialing in the settings to cut through the clutter and truly see those elusive fish.
Mounting Your Transducer for Maximum Visibility
Where and how you mount your LiveScope transducer makes a world of difference. There are primarily two common methods for walleye fishing, each with its own set of pros and cons.
The most popular choice for many is mounting the transducer directly to your trolling motor shaft. Brands like Minn Kota and Garmin offer accessories that secure the transducer snugly. The main advantage here is that your LiveScope view automatically turns with your trolling motor, meaning your sonar is always pointing where your boat is headed or where you're actively working your bait. This is incredibly intuitive, especially when spot-locking or following contour lines. However, there are potential downsides. The trolling motor can introduce electrical interference, causing lines or fuzziness on your screen. Proper grounding and careful wiring can mitigate this, but it’s a common frustration. Also, if you’re trying to look in a different direction than your trolling motor is pointing, you're out of luck.
For ultimate control and often superior image clarity, many serious walleye anglers opt for a dedicated pole mount. These mounts, often aftermarket solutions from companies like Summit Fishing or Rite-Hite, clamp to your boat and allow you to manually rotate and articulate the transducer independently of your trolling motor. This means you can scan a full 360 degrees around your boat while remaining stationary, or quickly pivot to follow a fish you’ve spotted. The main pros are reduced interference, independent aiming, and often better range and less obstruction from the boat's hull or trolling motor propeller. The trade-off? It's an additional piece of equipment to set up, and you have to manually adjust its direction, which takes some getting used to. Many of these specialized pole mounts and associated accessories can be found easily on Amazon, offering a variety of designs to fit different boat layouts.
Regardless of your chosen mount, the orientation of your transducer is key. For walleye, you'll often toggle between LiveScope Forward (for scouting ahead of the boat, looking for weed lines, rock piles, or suspended fish) and LiveScope Down (for vertical presentations once you're on top of fish). Learning how to quickly switch modes and adjust your transducer angle is a skill that comes with practice.
Essential Settings and Adjustments for Clear Walleye Returns
Once your LiveScope is physically installed, the real magic happens in the software settings. Dialing these in is crucial for transforming a murky screen into a crisp, fish-filled display.
The most fundamental setting is Gain/Sensitivity. This controls how sensitive the transducer is to echoes. Too low, and you'll miss faint returns from smaller fish or those at the edge of the beam. Too high, and your screen will be cluttered with noise, making it hard to distinguish actual fish. Start in the middle and slowly increase it until you see a clear picture with minimal static. You want to see distinct fish returns, not a blurred mess.
Next, adjust your Range. This sets the maximum distance LiveScope displays. If you’re fishing shallow breaks for walleye, you might set your range to 50 feet. If you're scanning open water for suspended fish, you might push it out to 80-100 feet or more. A shorter range means a more detailed, focused view of the immediate area, which is often preferable for precise walleye targeting. Similarly, fine-tune your Depth Range to match the water column you're fishing. If walleye are holding tight to the bottom in 20 feet of water, adjust your depth range to reflect that, giving you maximum resolution in the critical zone.
Choosing the right Color Palette can also significantly impact your ability to spot walleye. While personal preference plays a role, many anglers find palettes like "Amber," "Iron," or "Classic" offer excellent contrast between fish, baitfish, and structure. Experiment to find what works best for your eyes and the lighting conditions. A good palette makes fish "pop" off the screen.
Don’t overlook TVG (Time Varied Gain) and Noise Rejection. TVG helps suppress surface clutter and improve target separation closer to the transducer while maintaining sensitivity deeper in the water column. Noise rejection settings can help filter out electrical interference from your boat's systems, including your trolling motor, if you’re using that mounting method. Start with medium settings for both and adjust as needed to clean up your display without losing crucial fish signals. Patience with these adjustments will pay off immensely, allowing you to clearly differentiate a trophy walleye from a school of baitfish. Knowing how to adjust these settings on the fly is part of mastering any modern sonar, and crucial for techniques like How to Catch Walleye Through the Ice in Minnesota.
| Setting/Feature | Description for Walleye Fishing | Optimal Use |
|---|---|---|
| Gain/Sensitivity | Controls transducer's echo detection. Too low misses fish, too high adds clutter. | Adjust until fish returns are clear against minimal background noise. |
| Range (Forward/Down) | Sets max viewing distance. | Use shorter ranges (30-80 ft) for detailed target zones, longer for scouting open water. |
| Depth Range | Sets max vertical viewing depth. | Match to the water column where walleye are actively holding. |
| Color Palette | Visual display of sonar returns. | "Amber," "Iron," or "Classic" often provide best contrast for fish separation. |
| TVG (Time Varied Gain) | Reduces surface clutter; maintains sensitivity deeper. | Helps clean up the top of the water column without sacrificing deep targets. |
| Noise Rejection | Filters out electrical interference. | Use to minimize screen fuzziness, especially with trolling motor mounts. |
| Transducer Mode | Forward, Down, or Perspective. | Forward for scouting; Down for vertical jigging; Perspective for wide area mapping. |
Tactical Walleye Fishing with LiveScope in Minnesota
Now that your Garmin LiveScope is dialed in, it's time to put it to work on the water. This is where LiveScope truly shines, transforming how you approach locating and catching walleye. It's not just a fish finder; it's a decision-making tool that informs every cast and every retrieve.
Locating Walleye on Structure and Open Water
Finding walleye often feels like searching for a needle in a haystack, especially on vast Minnesota lakes. LiveScope dramatically narrows that search. When you're driving over well-known walleye haunts like weed lines, rock piles, humps, or break lines, LiveScope allows you to see individual fish holding tight to these structures or cruising their edges. Instead of just seeing a contour change on your map, you can actively scan ahead, identifying subtle irregularities in the bottom where walleye might be ambushing bait. On a lake like Mille Lacs, for example, known for its extensive mud flats, you can use LiveScope Forward to scan these flat expanses, seeing individual walleye suspending slightly off the bottom or relating to small transitions that traditional sonar might miss. This ability to visually confirm fish presence before you even drop a line is incredibly powerful.
Even in open water basin areas, where walleye might be suspended over deep water, chasing schools of tullibee or cisco, LiveScope gives you the edge. You can spot these baitfish schools and, more importantly, see the larger walleye lurking nearby. The real-time nature allows you to follow these moving schools, anticipating where the feeding action will be. It's like having an eagle eye directly into the water, showing you the exact location of fish relative to your boat, whether they are buried in the weeds or suspending freely. This visual confirmation is a major boost to your confidence and efficiency. For more general tactics, check out our guide on Walleye Fishing Techniques: Complete Minnesota Guide.
Observing Fish Behavior and Presenting Baits Effectively
This is perhaps the most exciting aspect of fishing with LiveScope – becoming a literal underwater observer. No longer are you guessing if a fish is interested; you can see it. You can cast a lure, watch it sink on your screen, and then observe a walleye approach it. Is it following closely? Is it ignoring it? Is it flaring its fins and getting ready to strike? This immediate, visual feedback creates a "cat and mouse" game that is both thrilling and incredibly educational.
If a walleye follows your lure but doesn't commit, LiveScope allows you to instantly adjust. Speed up your retrieve, slow it down, change your jigging cadence, or even subtly change your bait's action. You might observe a walleye following a crankbait, and then notice it only bites when you pause the retrieve. Or maybe a fish is ignoring your jig and minnow; you can switch to a livelier leech on a slip bobber and watch the difference in its reaction. This real-time interaction helps you quickly dial in the perfect presentation for that specific moment and fish. It removes a ton of guesswork and helps you learn incredibly fast about what specific fish are responding to on any given day. It’s like being able to read a walleye's mind, making you a much more adaptable and successful angler.
Integrating LiveScope with Other Walleye Techniques
LiveScope isn’t just a standalone technique; it enhances nearly every walleye fishing method you already use. It's a layer of intelligence that makes you more efficient and effective across the board.
For Jigging for Walleye: Jig & Minnow Basics, LiveScope is a revelation. Instead of blindly dropping a jig, you can pinpoint individual walleye or groups of fish on your screen and drop your bait with surgical precision. Watch your jig descend, position it directly above or in front of the fish, and then observe their reaction. If a fish swims away, you know immediately and can adjust your presentation or move on. If it approaches, you can work your jig to entice a strike, watching the entire process unfold. This is especially potent when fishing vertically in deeper water or around tight structure.
Even when Trolling for Walleye: Crankbaits & Leadcore, LiveScope can be a secret weapon. While you might not be directly watching fish hit your trolled lures, you can use LiveScope Forward to scout areas before you deploy lines. Scan along a contour, identify baitfish schools, or locate key structure that holds walleye. This helps you determine optimal trolling paths and depths before you invest time setting up your spread. It adds a proactive scouting element to a traditionally reactive technique.
Perhaps where LiveScope shines brightest is in Ice Fishing in Minnesota: Complete Beginner-to-Pro Guide. The ability to see fish swimming into your cone, approach your bait, and react to your jigging motion through the ice is revolutionary. Traditional flashers show you a line; LiveScope shows you the actual fish moving. When a walleye swims in, you can adjust your jigging cadence, move your bait up or down, or even swap lures to trigger a bite. This is incredibly effective when targeting fish that are suspending or cruising off the bottom, giving you a competitive edge over anglers relying solely on traditional sonar. Learning How to Find Fish While Ice Fishing becomes much more intuitive with LiveScope. It essentially allows you to play a video game with real fish, making you faster and more accurate.
Common Challenges and Troubleshooting Tips
While Garmin LiveScope is an incredible piece of technology, it's not without its quirks. Like any advanced electronic, you might encounter some common issues, but with a bit of knowledge and troubleshooting, you can keep your system running smoothly and your screen clear.
Dealing with Interference and Clutter
One of the most frequent complaints from LiveScope users, especially those new to the system, is interference and screen clutter. This can manifest as fuzzy lines, streaks, or a generally "dirty" screen that makes it hard to distinguish fish from noise.
If you're using a trolling motor mount, electrical interference is a prime suspect. The electrical currents from the trolling motor can create electromagnetic noise that impacts the sensitive transducer. Solutions include ensuring your trolling motor battery is isolated from your starting battery and that all wiring is properly grounded. Some anglers use ferrite rings on their transducer cables to reduce interference. In more stubborn cases, a dedicated pole mount, which physically separates the transducer from the trolling motor, can be the ultimate solution.
Beyond electrical noise, other electronics on your boat can also cause issues. Make sure your LiveScope transducer is mounted far enough away from other sonar transducers (like those for your 2D or SideVü sonar) to prevent cross-talk. Environmental factors can also contribute to clutter. Air bubbles under the transducer, caused by boat movement or prop wash, can disrupt the sonar signal. Similarly, passing through excessive weeds or thick plankton blooms can create a cluttered screen. In these situations, try adjusting your TVG and gain settings to filter out some of the noise, or simply move to clearer water. Occasionally, ensuring all your software is up to date on both the black box and chartplotter can resolve unforeseen glitches that manifest as clutter.
Interpreting the LiveScope Display Accurately
The LiveScope display is powerful, but it requires a learning curve to interpret accurately. Unlike traditional sonar with its familiar fish arches, LiveScope shows you actual "blobs" or shapes moving in real-time.
A common challenge is differentiating fish from bait, debris, or structure. A large school of baitfish might appear as a dense cloud, while individual walleye might show up as distinct, larger returns. Learning to recognize the size, shape, and movement patterns of walleye on your screen comes with practice. Walleye often appear as elongated, torpedo-shaped returns, and you'll typically see them moving with purpose, often relating to the bottom or suspended structure. Debris, like a falling leaf or a stray branch, will usually have a more erratic or non-biological movement pattern.
Another aspect to master is understanding size and distance estimation on the screen. While LiveScope gives you real-time depth and distance, judging the exact size of a fish or its precise distance from your lure takes experience. The closer a fish is to the center of your beam, the stronger and more defined its return will be. Fish on the edges might appear fainter. Practice by dropping a known object, like a weight or a large lure, and observe how it appears on the screen. Over time, you'll develop an intuitive sense for what you're seeing. Don't get discouraged; the more time you spend watching your LiveScope display, the better you'll become at "reading" the underwater world it reveals. It's a skill, like casting or tying knots, that improves with dedication. If you're looking for more general Best Fish Finders & Electronics for Minnesota Fishing advice, there are plenty of resources to help you choose the right setup.
Disclaimer
The information provided in this guide is for general informational purposes only and does not constitute professional advice. Fishing regulations, techniques, and equipment recommendations can change. Always consult the latest Minnesota Department of Natural Resources (DNR) regulations before fishing and prioritize safety on the water.