How to Fish a Jigging Rap Through the Ice
You’re sitting in your portable on a mid-January afternoon, staring at your flasher with burning eyes. The bottom is lit up with red marks, but every time you jiggle your spoon, the fish sink back into the mud. It’s maddening. This guide solves that frustration by teaching you how to master the Jigging Rap, the ultimate power-fishing tool for Minnesota ice.
Understanding the Jigging Rap Anatomy
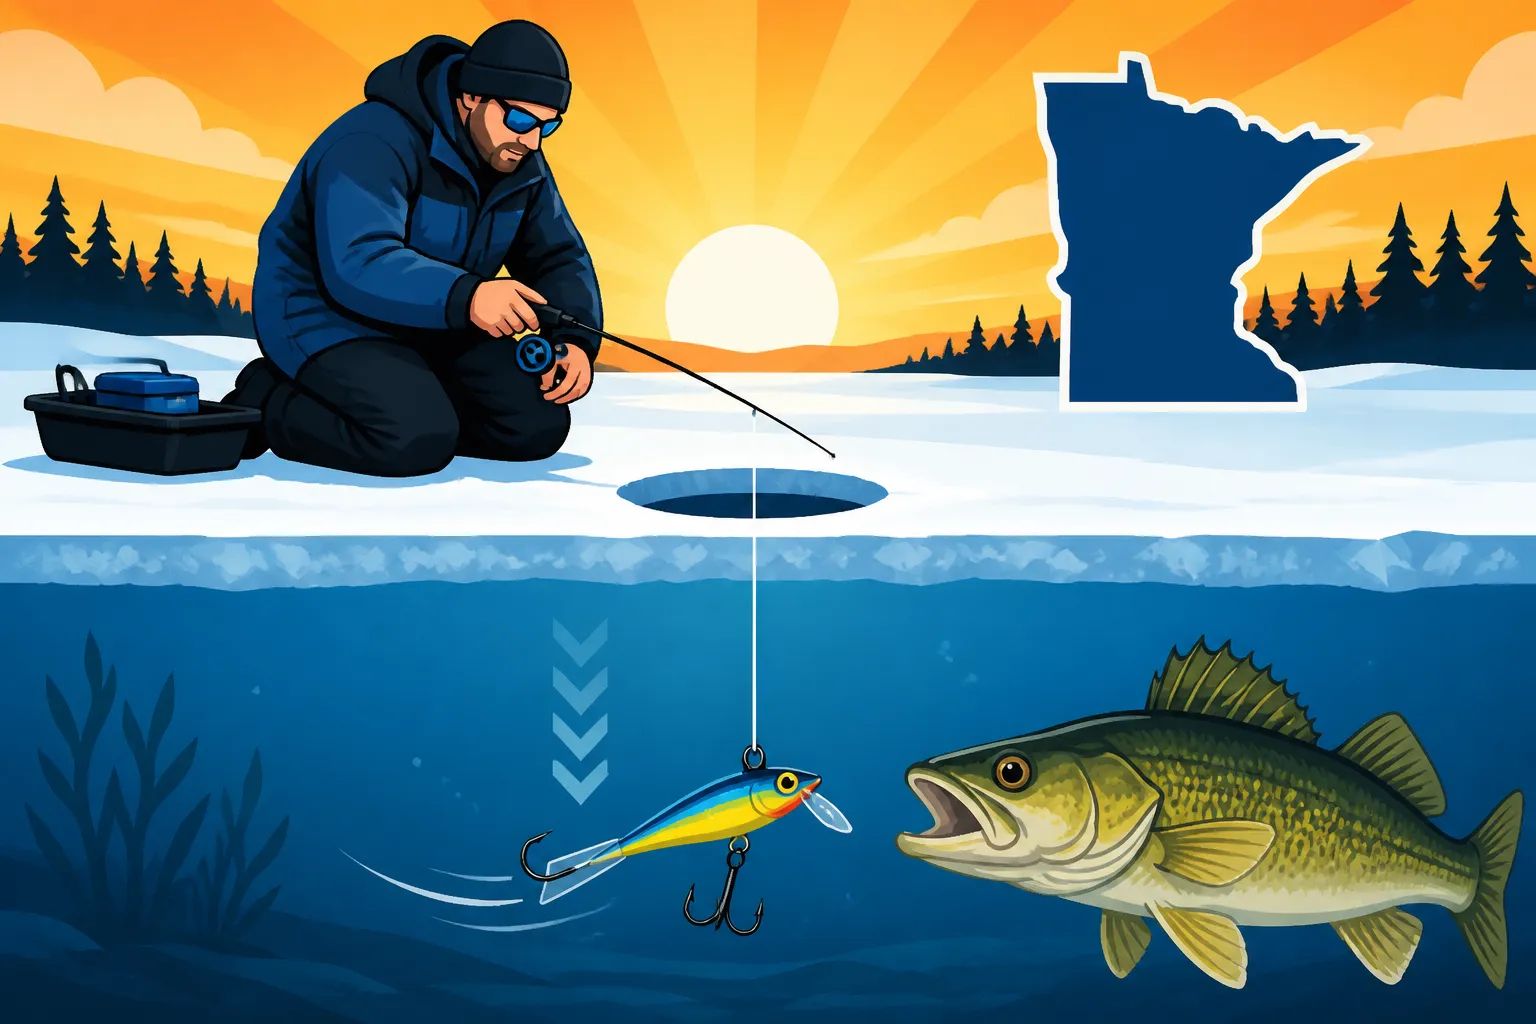
The Rapala Jigging Rap is not your standard vertical jig. While most lures rely on a simple up-and-down flutter, the Jigging Rap is designed to cover a massive horizontal area. It features a weighted lead body, a nose hook, a tail hook, and a center treble. The "secret sauce," however, is the plastic fin on the tail. This fin acts like a rudder on an airplane, causing the lure to glide outward in a circle when you snap the rod tip.
The Swimming Action and Glide
When you drop a Jigging Rap down the hole, its profile looks like a panicked minnow. Unlike a spoon that might just tumble, the Jigging Rap "swims." When you give the rod a sharp upward snap, the lure darts toward the ceiling of the ice, but as soon as the line slackens, that tail fin takes over. The lure glides in a wide, sweeping arc, often landing several feet away from the center of your ice hole.
This horizontal movement is crucial for the "Minnesota grind" during the mid-winter slump. Fish become lethargic when the oxygen levels drop, and a lure that stays in one spot is easy for them to ignore. A lure that darts away, however, triggers a predatory instinct. They think the meal is escaping, and that often results in a "reaction strike" where the fish hits the lure before even realizing what it is. To get the best action, many veteran anglers look for specific color patterns on Amazon that mimic local forage like shiners or perch.
Weight and Profile Selection
The weight of the Jigging Rap determines how fast it falls and how far it glides. In Minnesota, we typically use sizes ranging from the tiny W2 for panfish up to the heavy W9 for deep-water walleye on Lake Superior or Lake of the Woods. The profile is slim, mimicking a fathead minnow or a juvenile perch.
Choosing the right size is a balancing act. If you’re fishing in 10 feet of water, a W9 is overkill and will crash into the bottom too hard, spooking fish. Conversely, if you’re fishing the deep mud flats of Mille Lacs in 35 feet of water, a W3 will take forever to reach the bottom and won't have enough weight to pull your line tight. Understanding the weight helps you maintain a "feel" for the lure, which is the most important part of Ice Fishing for Walleye: Tactics & Setups.
The Hook Configuration
The hook setup on a Jigging Rap is both its greatest strength and its most annoying trait for beginners. You have a single hook on each end and a treble hanging from the belly. Most of the time, a walleye or perch will "inhale" the entire lure, getting caught on that belly treble. However, the nose and tail hooks are vital for those "drive-by" biters that just nip at the ends.
One veteran tip is to replace the stock belly treble with one that is one size larger or one that features a "glow drop" or colored epoxy. This gives the fish a specific target to aim for. While the stock hooks are sharp, browsing the tackle sections on Amazon for premium replacement trebles can drastically increase your hook-up ratio when the bite is light and fish are just "mouthing" the bait.
Gear Setup for Jigging Raps on Ice
You cannot fish a Jigging Rap effectively with a wimpy, noodle-style panfish rod. Because these lures are heavy and require an aggressive "snap" of the wrist, you need a rod with a significant amount of backbone. If the rod is too soft, the tip will simply load up during the snap, and the lure won't dart. It will just lazily lift, defeating the entire purpose of the design.
Rod Selection and Backbone
For most Minnesota applications, a 28 to 32-inch Medium or Medium-Heavy power rod with a Fast action tip is the gold standard. You want that tip to be sensitive enough to feel the weight of the lure, but the rod should quickly transition into a stiff spine. This is essential for both the jigging motion and the hookset. When a big walleye hits a Jigging Rap, they usually hit it on the "glide," meaning there is often a bit of slack in your line. You need a rod that can pick up that slack and drive the hook home instantly.
If you are fishing inside a smaller flip-over shelter, a 28-inch rod is more manageable. If you’re hole-hopping outside on the frozen tundra of Upper Red Lake, a longer 32 or 36-inch rod allows you to stand up straight and keep the lure away from your boots. Picking the Best Walleye Rods & Reels is a personal choice, but never compromise on the backbone when using heavy swimming jigs.
Reels and Line Choice
Line choice is perhaps the most debated topic among Jigging Rap aficionados. Some prefer the no-stretch properties of braided line, while others swear by fluorocarbon. If you use braid, you get incredible sensitivity and can feel a fish "breathe" on the lure in 40 feet of water. However, braid tends to freeze up in the guides if you’re fishing outside.
The most common setup for Minnesota pros is a 6lb to 10lb braid main line tied to a 3-foot fluorocarbon leader. The braid provides the strength and sensitivity, while the fluorocarbon provides stealth and just enough "shock absorption" to prevent the hooks from tearing out of the fish's mouth. You can find high-quality fluorocarbon spools on Amazon that are specifically rated for sub-zero temperatures, which helps prevent the line from becoming "curly" and unmanageable on the ice.
Terminal Tackle and Swivels
Line twist is the enemy of the Jigging Rap. Because this lure swims in circles, it will naturally twist your line into a chaotic mess within twenty minutes of fishing. If your line is twisted, the lure will spin uncontrollably when you pause, which looks unnatural and scares off big fish. To combat this, you must use a high-quality barrel swivel.
Tie your main line to one end of the swivel and your fluorocarbon leader to the other. This allows the lure to spin and glide freely without transferring that rotation to your main line. Some anglers use a small snap to make changing lure colors easier, but make sure the snap is small enough that it doesn't interfere with the nose hook of the Jigging Rap. This meticulous attention to terminal tackle is a hallmark of How to Catch Walleye Through the Ice in Minnesota.
Mastering the Jigging Cadence
Fishing a Jigging Rap is an active, physical process. This isn't the type of lure you "set and forget" in a deadstick hole. You are the conductor of this underwater orchestra. The goal is to create a rhythm that draws fish in from a distance and then frustrates them into biting once they arrive.
The Rip and Drop
The "Rip and Drop" is your primary searching move. Start with the lure about 12 to 18 inches off the bottom. Give the rod a sharp, 6-inch upward snap, and then immediately drop your rod tip back to the starting position. Watch your flasher—you’ll see the lure icon dart up and then slowly glide back toward the center. This large movement creates vibrations that fish can feel through their lateral lines from dozens of feet away.
Repeat this every 10 to 15 seconds. If you see a "mark" appear on your electronics, don't stop! This is a common mistake. If you stop the movement as soon as a fish appears, the "panicked baitfish" suddenly becomes a piece of painted lead, and the fish will lose interest. Continue the rip-and-drop, but perhaps reduce the intensity as the fish gets closer. Learning the Best Ice Fishing Jigging Cadence for Walleye is all about reading the fish's reaction on the screen.
The Twitch and Quiver
Once a fish is "on the screen" and following your lure, it’s time to transition from the Rip and Drop to the Twitch and Quiver. This is where you mimic a dying minnow that is struggling to stay upright. Instead of big 6-inch snaps, use tiny 1-inch "flicks" of the wrist. This makes the Jigging Rap dance in place, vibrating the belly treble.
Many times, a walleye will follow the lure up. As you see the fish rising, slowly lift your rod tip while maintaining that tiny quiver. You are literally playing "keep away" with the fish. By moving the lure slowly upward, you force the fish to make a decision: eat it now or let it escape. This cat-and-mouse game is why many anglers have started using How to Read a Flasher (Vexilar/Humminbird) to time their movements perfectly with the fish's approach.
Using Electronics to Time the Strike
In the modern era of Minnesota fishing, we are blessed with incredible technology. Whether you’re using a traditional flasher or forward-facing sonar like Garmin LiveScope, the Jigging Rap is a "visual" lure for the angler. You can actually see the "glide" on your screen.
When a fish "thumps" the lure, the icon on your screen will often merge with the lure's icon. This is the moment of truth. Because the Jigging Rap is heavy, fish will often "inhale" it and keep swimming upward, causing your line to go slack. If you see your lure icon disappear or "flicker" on the screen, set the hook! Don't wait to feel the weight on the rod. If you're looking to upgrade your tech, you can often find holiday deals on electronics through Amazon that make this visual style of fishing much easier.
Best Locations and Species for Jigging Raps in Minnesota
While the Jigging Rap is world-famous for walleye, it’s a versatile tool that works on nearly every predator fish in the Land of 10,000 Lakes. From the deep trenches of Lake Superior to the weedy bays of Lake Minnetonka, knowing where to deploy this lure is half the battle.
Walleye on the Mud Flats
In lakes like Mille Lacs and Winnibigoshish, walleyes spend a lot of time roaming the vast, featureless mud flats. On these flats, there is no "structure" to hold fish in one spot. They are constantly moving in search of perch or bloodworms. The Jigging Rap is perfect here because its loud, aggressive action acts as a calling card.
Anglers will often drill "grids" of holes across a flat and spend only 5 or 10 minutes in each hole. If there’s an active fish nearby, the swimming action of the Rap will bring them in. Just be sure to check the Mille Lacs Walleye Regulations (2026) before you head out, as keep-limits and slot sizes can change yearly. The "Glow Tiger" or "Chrome Blue" colors are legendary on these clear-water flats.
Perch and Crappie Adaptation
Don't let the size of the Jigging Rap scare you away from panfish. Large "Jumbo" perch in lakes like Leech Lake or Lake Winnie are notoriously aggressive. They will frequently hit a size W3 or even a W5 Jigging Rap. For panfish, the technique is slightly more subtle. You want more "quiver" and less "rip."
When targeting Ice Fishing for Crappie & Panfish, focus on the "basin" of the lake. Crappies will often suspend 5 to 10 feet off the bottom. Drop your Jigging Rap to their level and use very short, rhythmic snaps. The goal is to make the lure circle right in the middle of the school. This often triggers a "feeding frenzy" where multiple fish compete for the lure, leading to some of the fastest fishing of the winter.
Lake Trout and Inland Species
If you head up to the Boundary Waters or the deep lakes of the Gunflint Trail, the Jigging Rap becomes a weapon of mass destruction for Lake Trout. These fish are the ultimate predators of the north, and they love speed. For Lakers, you can use the largest W9 sizes and "rip" them with extreme aggression.
Unlike walleye, which prefer the lure near the bottom, Lake Trout will often chase a Jigging Rap all the way from 60 feet deep right up to the bottom of your ice hole. If you see a massive streak on your flasher chasing your lure, reel as fast as you can! The faster you move it, the harder the Laker will hit. This high-speed chase is a staple of Lake of the Woods Ice Fishing: Sleeper Houses & Walleye trips where multi-species action is the norm.
Common Mistakes and How to Avoid Them
Even with the best gear, the Jigging Rap has a learning curve. Many beginners get frustrated because they lose fish or find their line constantly tangled. Avoiding these three common pitfalls will put you ahead of 90% of the other anglers on the ice.
Over-Aggressive Ripping
While we call it "power fishing," there is such a thing as being too aggressive. If you rip the lure so hard that it "fouls" (the hooks catch the line), you’re wasting your time. A fouled lure doesn't swim; it just spins like a broken propeller.
If you feel a weird "vibration" or the lure feels lighter than usual, you’ve likely caught your nose hook on your leader. Drop the lure to the bottom to try and shake it loose, or bring it up and fix it. To prevent this, always ensure your rod tip follows the lure back down on a "semi-taut" line rather than letting the line go completely limp. For more tips on fine-tuning your approach, see our guide on Upper Red Lake Walleye Fishing Tips.
Ignoring the Treble Hook
The belly treble hook is the most important hook on the lure, yet it's often the most neglected. Over time, the constant contact with the ice and the mouth of the fish will dull the points. Use a small sharpening stone or simply replace the hook every few trips.
Furthermore, many people "over-bait" the treble. If you put a giant minnow head on the treble, it changes the balance of the lure and ruins the glide. If you must use bait, use a tiny piece of a minnow tail or a single wax worm. This adds scent without sacrificing the swimming action. If you're out of bait, checking for "scented plastics" on Amazon can provide a great alternative that stays on the hook longer during aggressive rips.
Choosing the Wrong Size for the Depth
As mentioned earlier, physics matters. A common mistake is using a small W3 in 30 feet of water. By the time that light lure reaches the bottom, your line has so much "bow" in it that you can't feel the lure's action. Conversely, a W9 in 8 feet of water is like dropping a brick; it has no room to glide before hitting the bottom.
| Jigging Rap Size | Weight (oz) | Target Depth (ft) | Primary Species |
|---|---|---|---|
| W2 | 1/8 | 4 – 10 | Bluegill, Perch, Crappie |
| W3 | 3/16 | 8 – 15 | Crappie, Jumbo Perch |
| W5 | 5/16 | 12 – 25 | Walleye, Sauger, Large Perch |
| W7 | 5/8 | 20 – 40 | Walleye, Northern Pike |
| W9 | 7/8 | 30 – 60+ | Lake Trout, Deep Walleye |
Always match your lure to the environment. If you’re fishing a new lake and aren't sure of the depth, start with a W5—it’s the "Goldilocks" size for most Minnesota lakes. If you find yourself in a situation where the fish are interested but won't commit, try "downsizing" to a W3, even in deeper water. Sometimes the smaller profile is exactly what it takes to trigger a finicky mid-winter walleye. For a full breakdown of which lures work best in different conditions, check out Best Lures for Ice Fishing Walleye.
Mastering the Jigging Rap is about more than just catching fish; it’s about understanding the predator-prey relationship beneath the ice. It’s an active, engaging way to spend a Minnesota winter day, and once you feel that first "thump" on the glide, you’ll never want to go back to sitting still.
Minnesota Fishing Regulations Disclaimer
Fishing regulations in Minnesota, including size limits, bag limits, and seasonal openings, are subject to change by the Minnesota Department of Natural Resources (DNR). Always consult the most recent Minnesota Fishing Regulations booklet or the DNR website before heading out on the ice. Specialized regulations often apply to specific bodies of water like Mille Lacs, Red Lake, and border waters. Practice safe ice travel and always check ice thickness before venturing out.