How to Catch Walleye Through the Ice in Minnesota
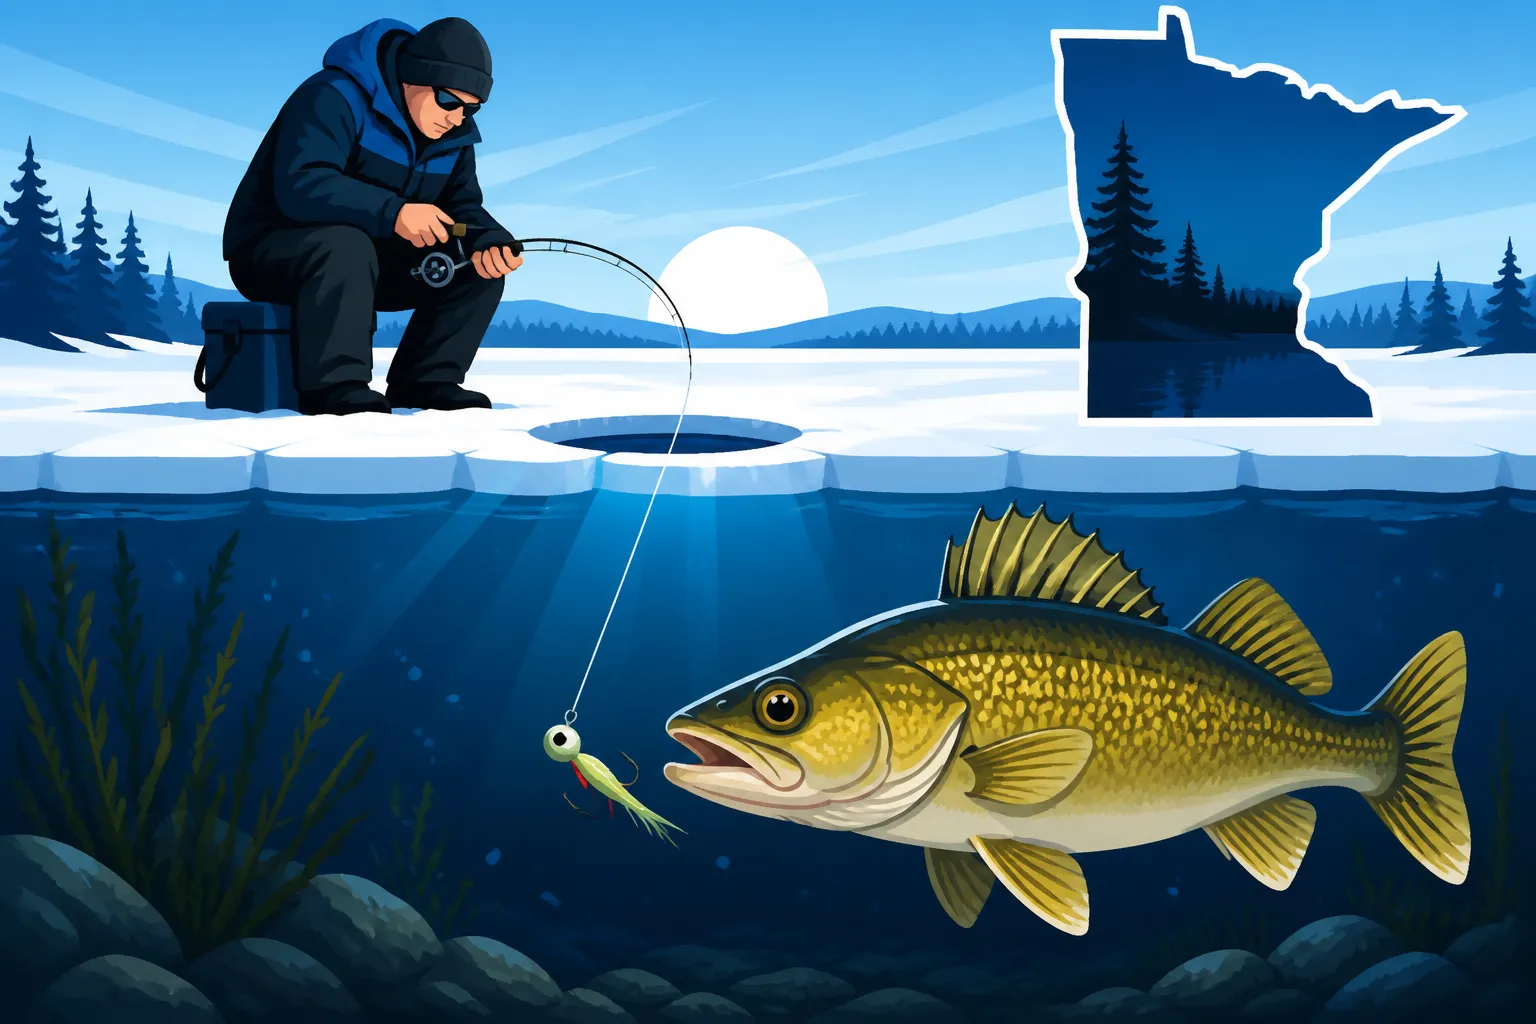
For many Minnesota anglers, ice fishing for walleye is a true winter passion, but the struggle of consistently finding and catching these elusive fish beneath a sheet of ice can be incredibly frustrating. It's a whole different ballgame than open-water fishing, demanding patience, specific gear, and a deep understanding of their winter habits. This guide aims to equip you with the knowledge and strategies to confidently chase and successfully land walleye through the ice, turning those slow days into memorable outings.
Understanding Walleye Behavior Beneath the Ice
Walleye don't just disappear under the ice; they adapt. Knowing their typical movements and feeding patterns when lakes freeze over is your first step toward consistent success. It's about thinking like a walleye, understanding their needs for food, oxygen, and comfort in a cold, dark world.
Seasonal Movements and Winter Habits
Walleye behavior changes significantly throughout the ice fishing season, primarily influenced by available forage, oxygen levels, and the natural progression of winter.
During early ice (usually November into early December in Minnesota), when the ice is just forming and still safe to walk on, walleye often relate heavily to shallower areas. Think green weed lines, submerged rock piles, and shallow points that were productive during late fall. These areas still hold abundant baitfish, and the oxygen levels are usually excellent. The walleye haven't yet moved to their deep wintering holes, making this a prime time for aggressive shallow water bites, sometimes in as little as 8-12 feet of water. However, ice conditions are critical during this period, and safety should always be your top priority.
As mid-winter sets in, typically from late December through February, walleye often migrate to deeper, more stable environments, especially in larger Minnesota lakes like Leech Lake or Lake Winnibigoshish. They'll hold on main lake humps, deep break lines, saddles between structures, and basin edges where forage fish like cisco (tullibee) and perch congregate. Depths can range from 20 to 40 feet or even deeper, depending on the lake's profile. The bite can be slower, often requiring more subtle presentations, as fish become less active and metabolism slows down. This is when your electronics really earn their keep, helping you pinpoint these deeper holding areas.
Finally, in late ice (March, leading up to the opener), as the ice begins to deteriorate and spring melt introduces more oxygen-rich water, walleye activity often picks back up. They might move shallower again, similar to early ice, revisiting those green weed beds and structure as they begin to stage for the upcoming spawn. This period can offer some of the most exciting fishing, with larger fish often being caught. Just remember, late ice can be the most dangerous, so always check ice conditions meticulously before venturing out.
Prime Feeding Times and Low-Light Advantage
Walleye are notorious for their low-light feeding habits, and this doesn't change when a blanket of ice covers the lake. In fact, it often becomes even more pronounced. The periods around dawn and dusk are absolute prime time for walleye, both during early and late ice. During mid-winter, these windows might be shorter but are still incredibly significant.
Why the low-light preference? It's all in their eyes. Walleye possess a highly reflective layer in their eyes called the tapetum lucidum. This reflective layer enhances their vision in dim light, giving them a distinct predatory advantage over their prey, which might struggle to see as well in low-light conditions. This means that even on bright, sunny winter days, the walleye might only be active during those golden hours just after sunrise and before sunset. On overcast or snowy days, however, the bite can extend throughout the day, as the natural light penetration is reduced, mimicking perpetual low-light conditions. Don't be afraid to stay out well past sunset during winter; sometimes the best action doesn't even start until a half-hour or hour after the sun dips below the horizon. Understanding their nocturnal nature is key to consistent success.
Essential Gear for Your Walleye Ice Fishing Arsenal
Having the right tools for the job can make or break your ice fishing experience, especially when targeting walleye. From what's in your hand to what keeps you warm, every piece of gear plays a role in your comfort, safety, and success.
Rods, Reels, and Line Choices
When you're out on the ice, your rod and reel are your direct connection to the fish below. For walleye, you'll want something sensitive enough to detect those subtle bites but with enough backbone to handle a spirited fight. I typically recommend a medium-light to medium power ice rod, usually in the 28 to 36-inch range. Look for a rod with a sensitive tip – often graphite or a composite blend – that telegraphs even the lightest tap. The "Best Ice Fishing Rods for Walleye & Panfish" article can give you more specific recommendations. A good example is a rod from the St. Croix Legend Black Ice series, known for its sensitivity.
Pair that rod with a small, high-quality spinning reel (size 500 to 1000) that has a smooth, reliable drag system. You'll be fighting fish in close quarters, and a jerky drag can easily lead to a broken line or pulled hook.
For line, a combination setup often works best. Spool your reel with 6-10 lb braided line, which offers superior sensitivity and strength with minimal stretch. The lack of stretch helps you feel those light bites. However, braided line can be visible to fish and freeze up more easily in cold conditions. To combat this, tie on a 4-6 foot leader of 6-10 lb fluorocarbon line. Fluorocarbon is nearly invisible underwater, more abrasion-resistant, and won't absorb water like braid, reducing ice-up issues. It's a perfect compromise that gives you the best of both worlds.
Augers and Ice Shelters for Comfort and Mobility
You can't catch fish if you can't get to them, and that starts with drilling holes. For walleye, an 8-inch auger is generally preferred over a 6-inch. It allows for a bit more room when landing larger fish and gives you more space to maneuver your transducer for your flasher. When it comes to power, you have options:
- Hand augers are great for early ice and shallower ice, but they're a workout and impractical for thick mid-winter ice.
- Gas augers (like a Jiffy or Eskimo) are powerful and fast, capable of drilling through feet of ice quickly. The downside is the noise, fumes, and maintenance.
- Propane augers offer similar power to gas but with fewer fumes and easier starting in cold weather.
- Electric augers (such as the StrikeMaster Lithium 40v or Ion) have surged in popularity. They are quiet, scent-free, and incredibly efficient, especially for drilling numerous holes while "hole hopping." The battery life can be a concern on extremely cold days or if you're drilling dozens of holes, so always bring a spare if you have one. For more detailed comparisons, check out "Best Ice Augers for Minnesota: Electric vs Gas". You can find many reliable electric augers on Amazon.
Once you've found your spot, an ice shelter is essential for comfort and extending your time on the ice. Minnesota winters are no joke!
- Portable hub shelters (like those from Clam or Eskimo) are lightweight, spacious, and quick to set up, offering excellent protection from the wind and cold. They're great for groups or when you plan to stay in one spot for a while.
- Flip-over shelters (such as Otter or Clam sled-style houses) are often preferred by more mobile anglers. They set up in seconds, are easily pulled by hand or ATV, and provide a self-contained fishing station with integrated seats and storage. They're fantastic for hole hopping or when you need to cover a lot of ground. Both types offer insulated versions, which are highly recommended for keeping you warm. To help you decide, take a look at our "Best Ice Shelters: Clam vs Otter (Flip vs Hub)" guide.
Electronics: Flashers and Live Sonar for an Edge
If there's one piece of gear that has revolutionized ice fishing for walleye, it's electronics. A flasher is an absolute game-changer. Brands like Vexilar, Humminbird, and MarCum dominate the market, and they all do one critical thing: show you what's happening directly below your hole in real-time.
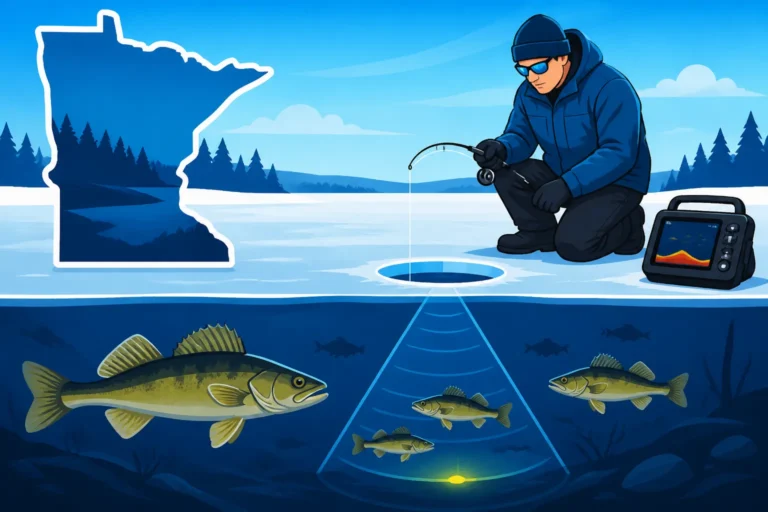
A flasher displays your lure, any fish that enter its cone, and the bottom composition. This isn't just about seeing fish; it's about seeing how fish react to your presentation. Are they interested? Are they ignoring it? Do they rise up to it then turn away? This immediate feedback allows you to adjust your jigging cadence, lure choice, and depth until you get a strike. It's like having x-ray vision into the underwater world. Our guide on "How to Read a Flasher (Vexilar/Humminbird)" offers an in-depth look at mastering these devices.
For those looking for an even more advanced edge, forward-facing sonar systems like Garmin LiveScope or Humminbird Mega Live are gaining popularity. While more expensive and requiring more setup, these systems allow you to see fish not just below your hole, but out to the sides for dozens of feet. This can be invaluable for locating schools of walleye moving in or for targeting specific pieces of structure without constantly redrilling holes. For most anglers, however, a reliable flasher is the primary and most essential piece of electronics for ice fishing walleye. Consider checking out "Best Ice Fishing Flashers: Vexilar vs Humminbird vs Garmin" to compare top models.
Proven Ice Fishing Techniques for Catching Walleye
Once you've got your gear dialed in, it's time to talk tactics. Walleye often require a blend of aggressive presentations and subtle finesse, and knowing when to apply each can make all the difference.
Jigging and Deadsticking Strategies
The most common and often most effective way to catch walleye through the ice is through a combination of active jigging and deadsticking. This one-two punch is incredibly versatile and allows you to cover different fishing styles simultaneously, maximizing your chances of a bite. You're legally allowed to use two lines in Minnesota while ice fishing, so take advantage of it!
Active Jigging: This involves working a lure vertically to attract and trigger walleye. The key here is experimentation with your jigging cadence.
- Spoons: Lures like the classic Swedish Pimple, Northland Buck-Shot Rattle Spoon, or PK Lures Flutter Fish are incredibly effective. A common technique is to lift the spoon sharply, letting it flutter back down on a semi-slack line, then pausing for a few seconds. The lift attracts attention, and the flutter mimics a dying baitfish.
- Jigging Raps: Rapala Jigging Raps or similar glide baits are another walleye staple. These lures dart aggressively when lifted, then glide in a wide circle on the fall. A slightly less aggressive lift-and-drop, allowing the lure to swim, often triggers strikes.
- Tungsten jigs: While often associated with panfish, larger tungsten jigs tipped with a minnow head or plastic can be deadly, especially when fish are less aggressive.
The beauty of jigging is that you can actively search for a bite. If you see a fish on your flasher, you can adjust your jigging action to entice it. Sometimes a hard rip is needed, other times a barely perceptible jiggle. A lot of great advice can be found in "Ice Fishing for Walleye: Tactics & Setups."
Deadsticking: While one rod is actively jigging, the other should be your deadstick. This is a more passive approach, often rigged with live bait under a bobber or simply sitting in a rod holder. Walleye can be finicky, and sometimes they prefer a natural, motionless presentation.
- A slip bobber rig with a lively minnow (a shiner or fathead) hooked lightly under the dorsal fin or in the lips is a deadly deadstick setup. Set the minnow just above the bottom or at the depth where you're seeing fish on your flasher.
- The idea is to let the minnow do the work, swimming naturally and enticing cautious walleye. Often, a walleye will first hit your jigging lure, then turn and take the deadstick. It’s also common for them to ignore the active presentation entirely and only commit to the stationary live bait. Always have a deadstick down; it accounts for a significant number of walleye catches.
Best Baits and Lures for Iced Walleye
Choosing the right bait or lure is crucial, and it often comes down to matching the hatch or triggering a reaction strike.
For live bait, minnows are king for walleye through the ice.
- Shiners (golden shiners, spottail shiners) are often considered the best. Their natural activity and scent are irresistible.
- Fathead minnows are also excellent, especially in lakes where they are a primary forage.
- Rainbow chubs are tougher and stay lively longer, making them a good choice when fishing deeper or in active areas.
- Hook them carefully, either through the lips or lightly behind the dorsal fin, to keep them swimming naturally. You can find high-quality live bait at most local bait shops, and some ice fishing tackle, like bobbers and sinkers, can even be purchased on Amazon.
When it comes to artificial lures, you'll want a selection of different types, sizes, and colors.
- Jigging Rapalas (and their clones like Slab Raps, Hyper Raps, or Clam Tikka Minos) are probably the most iconic walleye ice lures. Sizes W5 to W9 are common. Experiment with natural colors like perch or silver, as well as brighter colors like firetiger or glow patterns, especially in stained water or low light.
- Spoons are incredibly versatile. Heavier spoons like the Northland Buck-Shot Rattle Spoon or Johnson Thinfisher emit sound and vibration, while lighter fluttering spoons like the PK Lures Flutter Fish have a more erratic, dying action. Again, natural baitfish patterns and glow are excellent choices.
- Lipless crankbaits (like a Rapala Rippin' Rap or Salmo Zipper) can be very effective, especially for aggressive walleye. Their loud rattles and tight wobble can call fish in from a distance.
- Tungsten jigs in larger sizes (1/8 oz to 1/4 oz) tipped with a minnow head or a small plastic paddle tail can be deadly for a more subtle presentation.
Don't be afraid to experiment! If fish aren't responding to one type of lure or presentation, switch it up. "Best Lures for Ice Fishing Walleye" provides an even deeper dive into specific recommendations.
Understanding Hole Hopping and Spread
Mobility is often the name of the game when ice fishing for walleye, especially during tough bites. The concept of hole hopping means actively moving from one freshly drilled hole to another until you locate active fish.
You might drill a "grid" of 10-20 holes over a productive looking area – perhaps a point extending into a main lake basin, or a series of humps. Start by fishing each hole for 5-10 minutes. If you don't see any activity on your flasher or get a bite, move to the next hole. Walleye often congregate in specific spots, and sometimes moving just 20-30 feet can put you right on top of a school. This strategy requires a good electric auger for quiet, efficient drilling, and a portable flasher.
In Minnesota, you're permitted to fish with up to two lines at a time while ice fishing. This allows you to effectively spread your lines. If you're fishing from a portable shelter, you might have one actively jigging rod and one deadstick in a rod holder. If you're fishing outside or with a buddy, you can spread your holes out a bit more (within legal limits for distance between lines) to cover a wider area, increasing the chances of intercepting a cruising walleye. Just be mindful of other anglers and respect their space. Knowing "How Many Lines Can You Use Ice Fishing in Minnesota?" is essential before you head out.
Finding Walleye Hotspots Under the Ice
Finding walleye on the vast frozen expanse of a Minnesota lake can feel like searching for a needle in a haystack. But walleye are creatures of habit, and understanding where they prefer to hold in winter can drastically narrow down your search.
Key Structures to Target
Just like in open water, walleye in winter are drawn to specific structures that offer food, shelter, or travel routes. Your best friends for finding these spots are detailed lake maps (digital ones like Navionics or LakeMaster are invaluable) and a good understanding of underwater topography.
- Points: These are extensions of land that stretch out into the lake. Walleye often cruise along the sides of points, especially where they drop off into deeper water. Focus on the "nose" of the point and its adjacent break lines.
- Humps: Underwater islands or mounds are classic walleye magnets. They provide elevated structure in deeper water, attracting baitfish, and in turn, walleye. Fish the top, sides, and base of humps.
- Break Lines: These are changes in depth, often steep drops where the bottom contour changes significantly. Walleye will patrol these breaks, ambushing prey moving between shallow and deep water. Look for inside and outside turns on these breaks.
- Weed Edges: Particularly early and late in the ice season, green weed beds (cabbage, coontail) hold abundant oxygen and baitfish. Walleye will often sit just outside these weeds, darting in to feed. Your flasher will clearly show the dense signal of weeds.
- Saddles: These are deeper areas that connect two shallower structures, like two humps or points. They act as travel corridors for walleye moving between feeding and resting areas.
- Main Lake Basin Edges: In large, deep lakes, walleye will often relate to the edges of the main basin, especially if there are subtle contours or transitions in bottom composition.
Don't just drill one hole on a structure and give up. Drill a series of holes, almost like a grid or a line, across the structure to truly understand how fish are relating to it. This technique is extensively covered in our guide on "How to Find Fish While Ice Fishing."
Depth and Bottom Composition
The ideal depth for walleye ice fishing isn't a fixed number; it varies wildly based on the specific lake, time of winter, and even time of day. However, there are general patterns to consider.
- Early ice: As mentioned, 8-20 feet is often productive, especially near green weeds and shallower points.
- Mid-winter: Walleye tend to move deeper, often settling in the 20-40 foot range, particularly in larger, clearer lakes. In stained or shallow lakes, they might remain shallower but still relate to the deepest structures available.
- Late ice: They might begin migrating back towards shallower waters, anywhere from 10-25 feet, as they prepare for the spawn.
Always start by targeting depths that have historically produced in that lake, but be prepared to adjust. If your flasher isn't showing fish at one depth, move shallower or deeper incrementally. Our article "What Depth to Ice Fish for Walleye" offers more specific insights.
Bottom composition also plays a role. Walleye prefer harder bottoms like gravel, rock, or sand. They often avoid soft, mucky bottoms that tend to have lower oxygen levels. Your flasher can help you interpret bottom hardness – a harder bottom will show a thicker, more intense signal, while a soft bottom will be a thinner signal. Keep an eye out for transitions from soft to hard bottom, which can be prime ambush points.
Reading the Ice and Environmental Cues
Beyond underwater structure, environmental factors influence walleye behavior and your fishing success. Paying attention to these cues can give you a significant advantage.
- Pressure Changes: Walleye are known to be sensitive to barometric pressure. Stable or rising pressure often correlates with a better bite, while rapidly falling pressure can shut them down. While you can't control the weather, knowing this helps manage expectations.
- Snow Cover: A heavy blanket of snow on the ice reduces light penetration into the water, which can extend the walleye's low-light feeding windows throughout the day. Conversely, clear ice on a sunny day might push them deeper or make them more active only at dawn and dusk.
- Oxygen Levels: As winter progresses, especially in shallower, eutrophic lakes, oxygen levels under the ice can decrease. Walleye will move to areas with higher oxygen, often near inflows or areas of green weeds.
- Angler Activity: While you don't want to crowd others, seeing a cluster of portable shelters or permanent houses in a certain area often indicates active fish. However, be mindful that heavy pressure can also make fish more wary. Use these cues as starting points, but always be willing to venture away from the crowds to find your own hot spots.
Maximizing Your Catch and Handling Walleye Responsibly
Catching walleye through the ice is rewarding, but ensuring you're doing it effectively and ethically adds to the enjoyment. A few final tips can boost your success rate and help preserve Minnesota's incredible fishery.
Developing an Effective Jigging Cadence
This is where the art of ice fishing really comes into play, and it's a skill that takes practice. There's no single "best" jigging cadence because what works one day might not work the next, and what works for one fish might not work for another. The key is to experiment and, crucially, watch your flasher.
When you see a walleye approach your lure on the flasher, you have a direct window into its reaction.
- Aggressive fish: Sometimes a few sharp rips, followed by a long pause, will trigger a strike. Other times, a rapid jigging motion will entice them.
- Finicky fish: More often, walleye in winter are lethargic. You might need to try very subtle lifts, barely twitching the rod tip, or just shaking the lure in place. Sometimes, simply letting the lure sit completely still (a "dead stick" action on your jigging rod) will get a bite after an aggressive fish has investigated and backed off.
- The "chase": If a fish rises to your lure but doesn't commit, try slowly lifting your lure upwards, making it appear as if the baitfish is trying to escape. This "fleeing bait" presentation can often trigger a follow-up strike.
- Dropping the lure: Conversely, if a fish is high in the water column and not interested, try dropping your lure quickly past it. This can sometimes elicit an aggressive reaction strike as the fish thinks the bait is getting away.
Remember, every twitch, lift, and pause tells a story on your flasher. Pay attention to how the fish react and adjust accordingly. This constant feedback loop is why electronics are so vital for mastering the jigging cadence. For deeper insights into these nuances, check out "Best Ice Fishing Jigging Cadence for Walleye."
Responsible Catch and Release Practices
While harvesting a few walleye for a delicious fish fry is part of the Minnesota tradition, responsible angling also means practicing good catch and release, especially for larger fish or when fishing within slot limits.
- Minimize Air Exposure: Walleye are robust, but their gills and internal organs can be damaged by prolonged air exposure, especially in freezing temperatures. Get a quick photo if you want one, but return the fish to the water as quickly as possible.
- Handle Gently: Support the fish horizontally, especially larger ones, by supporting their belly. Avoid holding them vertically by the jaw if they are large, as this can damage their spine and jaw.
- Use Proper Tools: A good pair of needle-nose pliers or a de-hooker can help you quickly remove hooks, especially if they are swallowed.
- Understand Regulations: Always be aware of Minnesota's specific length and possession limits for walleye on the lake you are fishing. Many lakes have "slot limits" where fish within a certain size range must be immediately released to protect breeding stock. Knowing these rules is crucial to being a responsible angler.
Dressing for Success and Ice Safety
Minnesota winters are beautiful but unforgiving. Staying warm and safe is paramount.
- Layering is Key: Don't just throw on one heavy jacket. Dress in layers: a moisture-wicking base layer, insulating mid-layers (fleece, down), and a waterproof/windproof outer shell. This allows you to adjust to changing conditions and activity levels.
- Quality Outerwear: Invest in good quality ice fishing bibs and a jacket. Many modern ice fishing suits (like those from Striker or Clam) are insulated and even float-assisted, offering an extra layer of safety.
- Extremities: Your head, hands, and feet lose heat quickly. Wear a warm hat, insulated gloves or mittens (with removable liners for dexterity), and insulated, waterproof boots with thick wool socks. Hand warmers can be a lifesaver on bitter cold days.
- Ice Safety: Never take chances with ice. Always check ice thickness with an auger or spud bar as you venture out, especially on early or late ice. A minimum of 4 inches of clear, new ice is generally recommended for foot travel, 5-7 inches for snowmobiles/ATVs, and 8-12 inches for small vehicles.
- Safety Gear: Carry ice picks (worn around your neck for easy access in case you fall through), a throw rope, and tell someone where you are going and when you expect to return. Our "Ice Fishing in Minnesota: Complete Beginner-to-Pro Guide" emphasizes safety and preparation for your winter adventures.
Walleye fishing through the ice can be challenging, but with the right knowledge, gear, and a healthy dose of patience, it's an incredibly rewarding experience that allows you to enjoy Minnesota's beautiful winter landscape and its prized fish.
Disclaimer
The information provided in this guide is for general informational purposes only and is subject to change. Always consult the official Minnesota Department of Natural Resources (DNR) regulations before fishing, as rules regarding seasons, limits, and specific lake regulations can vary and are updated periodically. Ice conditions can be unpredictable; always prioritize safety and check local conditions before venturing onto the ice.