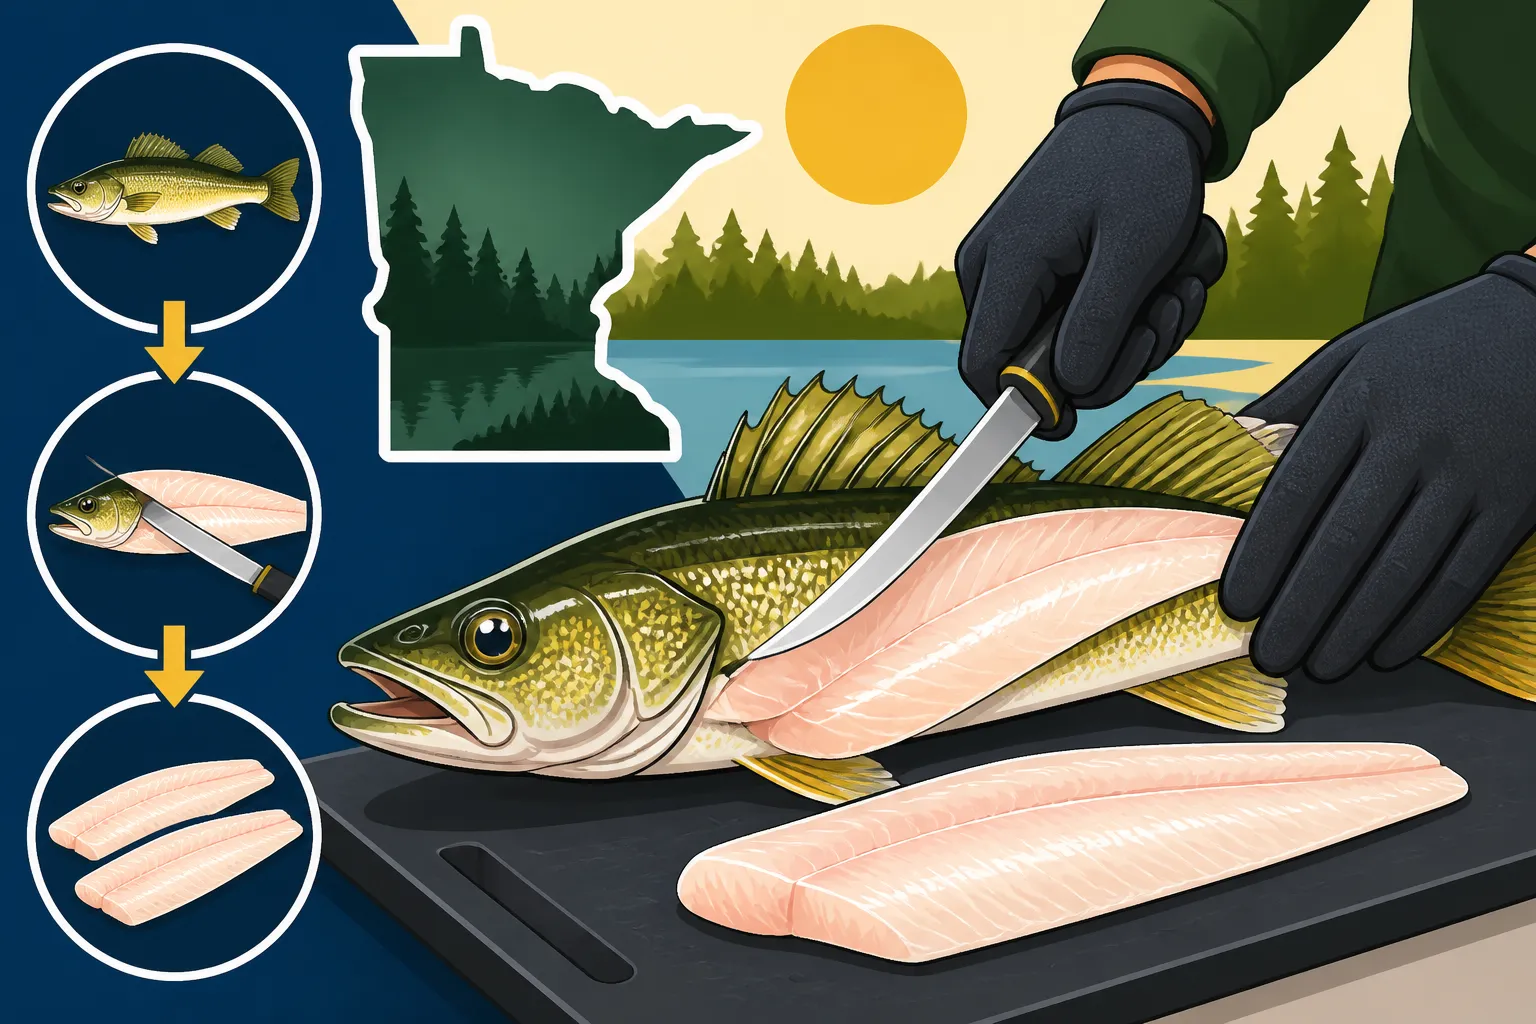
How to Fillet a Walleye (Step by Step)
There is nothing quite as painful as bringing home a keeper walleye after a long day on the lake, only to turn those prized fillets into ragged, wasted shreds of meat because your knife slipped or stuck on a rib bone. Learning proper knife mechanics saves time, protects your fingers, and yields beautiful, boneless fish fillets every single time. This step-by-step guide will walk you through the entire cleaning process so you can turn your catch into a clean, restaurant-quality meal.
Essential Tools and Prep Work for a Clean Fillet
Before you touch a knife to your catch, setting up a solid, stable cleaning station is critical. Walleye have slippery skin, razor-sharp gill plates, and stiff dorsal spines that love to poke thumb cushions when you least expect it. Trying to work on an unstable picnic table or a flexing plastic tote lid usually leads to jagged meat and frustration.
Choosing the Right Fillet Knife and Board
The right blade makes all the difference when carving around delicate rib structures. A flexible six-to-eight-inch fillet knife with a razor-sharp edge is ideal for standard walleye in the 14-to-20-inch range. If you regularly process limits of fish after a weekend trip, an electric fillet knife can save a massive amount of wrist fatigue, though traditional manual blades offer unmatched precision around the rib cage.
Many anglers order high-carbon stainless steel fillet blades or replacement electric knife blades directly from Amazon so they always have fresh, sharp steel ready before the season opens. Pair your knife with a large, non-slip cutting board made of HDPE plastic or hardwood. A wet towel under the cutting board keeps it from sliding across your tailgate or fish cleaning shack table while you work.
Keeping Your Workspace Safe and Sanitary
Cleanliness isn’t just about food safety; it directly impacts how easy it is to handle the fish. Walleye slime can make gripping the tail almost impossible. Keep a clean towel nearby to wipe down the tail section, or wear a textured cut-resistant glove on your non-knife hand. You can pick up cheap cut-resistant mesh gloves on Amazon that provide exceptional grip on slippery tails while preventing nasty nicks from erratic knife slips.
Before making your first cut, quickly rinse your walleye in cold water to clean off lake debris and excess slime. Ensure you understand local regulations regarding carcass disposal and possession rules, especially if you are traveling between lakes, by reviewing Minnesota Fishing Limits: Bag & Possession (2026) to ensure your harvest is completely legal.
Step-by-Step Walleye Filleting Technique
Taking your time through each phase of the cut ensures you maximize the yield from every fish. Walleye meat is mild, sweet, and firm, making it arguably the Best Fish for a Minnesota Fish Fry. Throwing away thick chunks of meat attached to the carcass is a crime against good eating, so pay close attention to blade pressure and angle.
Step 1: Making the Initial Shoulder Cut Behind the Gills
Lay the walleye flat on your cutting board with the back facing away from you and the head pointing toward your non-dominant hand. Lift the pectoral fin located just behind the gill cover. Angle your knife blade slightly toward the fish’s head, placing the edge right along the line behind the gill plate and pectoral fin.
Slice down through the thick shoulder flesh until you feel the hard resistance of the backbone. Do not cut through the backbone; simply press until the tip of your blade touches it. By angling the knife slightly forward toward the head, you salvage the triangular wedge of cheek and shoulder meat that many rushed anglers accidentally leave behind on the head.
Step 2: Tracing Along the Backbone to the Tail
Without removing the blade from the cut, turn the edge flat so it faces down toward the tail, perpendicular to the backbone. Place your off-hand firmly on the head of the walleye to anchor it. Using a smooth, sweeping motion, work the blade along the top of the backbone toward the tail.
You should feel and hear the blade clicking along the rib bones as you glide past them. Keep firm downward pressure on the flat of the blade so it rides right over the top of the ribs without cutting down through them into the guts. Stop your knife cut roughly one inch before the tail fin, keeping the fillet attached to the frame by a thin strip of skin. Flip the untrimmed slab of flesh over so it lies skin-side down on the board, using the still-attached tail as an anchor.
Step 3: Removing the Skin Without Wasting Meat
With the fillet lying skin-side down on your board, grip the tail end firmly with your fingers or a pair of clean pliers. Place the heel of your knife blade right at the seam where the flesh meets the skin at the tail hinge. Angle the blade down slightly toward the cutting board.
Instead of pushing the knife forward through the meat, pull the tail skin backward toward yourself while holding the knife completely still at a subtle downward angle. Wiggling the skin back and forth gently allows the blade to slice smoothly along the tough skin membrane without cutting into the white fillet meat. If done correctly, the skin will peel away clean, leaving a pure slab of white walleye meat sitting on your board while leaving no gray fat attached to the skin.
Step 4: Trimming the Rib Cage and Removing Pin Bones
Now that you have a skinless slab of meat, you must remove the rib bones and the line of small pin bones running down the center lateral line. Place the fillet meat-side up on the board. You will see the curved rib cage sitting along the top edge of the upper belly section.
Insert the tip of your flexible knife right under the top of the rib bones where they connect near the spine line. Lay the blade almost completely flat, angling the tip upward slightly into the bones. Slide the blade smoothly along the contour of the rib bones toward the belly edge, lifting the rib cage off the flesh in one clean sheet.
Finally, run your fingers down the middle of the fillet from the head end toward the tail. You will feel a firm row of tiny pin bones ending near the midpoint of the fillet. Cut a thin V-shaped wedge out of the center line to remove these bones entirely. This leaves you with two pure, completely bone-free strips of prime walleye loin. Repeat this entire sequence on the opposite side of the fish.
Walleye Fillet Yield and Processing Summary
To help you judge how much meat you will end up with after a harvest trip on waters like Mille Lacs or Leech Lake, reference this general processing overview. Yield percentages fluctuate depending on whether you leave the skin on for specific cooking methods, but standard boneless cuts follow these averages:
| Cut Type | Average Meat Yield | Ideal Cooking Method | Key Technique Note |
|---|---|---|---|
| Full Skinless Fillet | 30 to 35 percent of round weight | Pan-frying, deep-frying, baking | Require pin-bone removal along lateral line |
| Cheeks Only | 2 to 4 percent of round weight | Sautéing in butter, appetizers | Scraped out of head socket using a spoon or small blade |
| Skin-On Fillet | 35 to 40 percent of round weight | Grilling, blackening | Scale thoroughly before making shoulder cut |
| Bone-In Belly Strips | 5 to 8 percent of round weight | Smoker, fish stock | Trimmed away from main rib cage for crispy frying |
Maximizing Yield and Preparing Fillets for the Pan
A common question among beginners who study Are Walleye Good to Eat? Minnesota’s Favorite Fish is how to handle the extra delicacy meat found on larger walleye. Beyond the main side fillets, larger fish possess incredible cheek meat located in the circular socket right below the eye.
Insert the tip of a small paring knife around the top curve of the cheek bone, push down slightly, and sweep the blade downward to free a round medallion of dark, exceptionally tender meat. These walleye cheeks are considered by many guides to be the absolute best tasting morsel on the entire fish.
Once your fillets and cheeks are cut, wash them thoroughly under cold, running tap water or in a bucket of ice-cold fresh water. Avoid letting fresh fish fillets soak in still, warm water for extended periods, as this breaks down the firm muscle fibers and ruins the flaky texture. Pat the fillets thoroughly dry with paper towels. Excess water on the exterior of the fish prevents batter from sticking and causes oil to splatter during pan-frying.
If you plan to eat your harvest within forty-eight hours, wrap the dry fillets tightly in plastic wrap and store them in the coldest section of your refrigerator. For long-term freezing, vacuum sealing is the gold standard to prevent freezer burn and oxidation. If you do not own a vacuum sealer, you can search Amazon for affordable chamber or vacuum bag sealing kits, or freeze your fillets submerged in a small container of pure, cold water to lock out all air pockets.
Common Walleye Filleting Mistakes and How to Avoid Them
Even seasoned anglers mess up a fillet occasionally, especially when processing a heavy cooler full of fish after learning Walleye Fishing Techniques: Complete Minnesota Guide out on a windy day. Knowing where most mistakes occur helps you make real-time corrections before ruining meat.
Over-Angling the Knife Blade
The single most common mistake when cutting through the back of the fish is holding the knife at too steep of an angle. If you point the blade straight down into the board, you will cut right through the hard backbone, dulling your edge and leaving a massive strip of meat attached to the spine. Always keep the blade flat against the spinal structure, letting the bone guide the steel naturally.
Cutting Through Rib Bones Instead of Riding Them
When removing the rib cage from the fillet, rushing often leads to slicing straight through the ribs rather than underneath them. This leaves dozens of sharp bone fragments embedded inside the belly meat that require tedious removal with tweezers later. Take a second to feel the angle of the ribs with your finger, slide the tip of your blade under the thin membrane, and keep the blade pressed flat against the bone surface as you glide downward.
Dull Blades and Slippery Handles
Working with a dull blade requires excess force. When you apply heavy pressure to force a dull edge through tough fish skin, the blade easily slips off course, carving into your fingers or ripping the delicate muscle fibers into stringy mess. Sharpen your fillet knife after every three or four fish, or keep a handheld sharpener on your fillet table to touch up the edge instantly.
When practicing your fillet technique, remember to practice selective harvest. While keeping a mess of 15-to-18-inch eater fish provides amazing meals, releasing large trophy females supports healthy populations across famous waters detailed in our Mille Lacs Lake Fishing Guide: Walleye, Bass & More. Proper handling of fish you intend to release is equally important; learn Catch and Release Best Practices in Minnesota to ensure those bigger fish survive to spawn again.
If you enjoy catching other species alongside walleye, skinning and trimming techniques vary slightly depending on bone structure. For example, dealing with northern pike requires a specialized technique to handle their unique Y-bone structure, which you can master by reading our step-by-step guide on How to Fillet a Northern Pike (Remove Y-Bones).
Investing in a good pair of flexible gloves, keeping a razor-sharp edge on your blade, and taking your time through the rib-trimming phase will quickly transform you into the fastest, cleanest fish cutter in your boat group. With a little practice, processing a limit of clear-water walleye will become an enjoyable, satisfying end to every successful day on the water.
Disclaimer
This article is for general informational purposes only and does not constitute professional advice. Laws, prices and regulations vary by location and change over time. Consult a qualified professional for guidance on your specific situation.