How to Fish a Drop-Shot for Walleye
There's nothing quite as frustrating as showing up to your favorite Minnesota walleye spot, armed with your trusty jig-and-minnow or a classic bottom bouncer, only to find the walleye are completely shut down. They're there, you can see them on your electronics, but they just won't bite. This guide is all about equipping you with a precision technique – drop-shotting – that can turn those frustrating days into successful ones, especially when walleye are finicky.
Understanding the Frustration: Why Traditional Methods Fail Sometimes
We've all been there, right? You're on the water, excited for a day of chasing golden shiners, but the fish just aren't cooperating. It's not always about where the fish are, but how you're presenting your bait. Sometimes, what usually works just falls flat, leaving you scratching your head.
The Finicky Walleye Challenge: When Walleye Are Picky Eaters
Walleye, for all their glory as a premier game fish in Minnesota, can be incredibly moody. There are days when they're aggressive, hitting anything that moves. Then there are those other days – the post-front blues, high-pressure systems, or even just mid-summer doldrums – when they become incredibly lethargic. They might be suspended in the water column, a few feet off the bottom, or tucked so tightly into submerged timber or rock piles that a traditional jig just can't get to them effectively without snagging constantly.
Imagine you're fishing a deep breakline on Lake Vermilion. You're marking fish at 25 feet, but they're sitting five feet off the bottom. A standard jig drops quickly past them, and a bottom bouncer might drag below them. They're not actively chasing; they're just hovering, maybe occasionally looking for an easy meal. This is precisely when a subtle, suspended presentation becomes crucial.
Limitations of Standard Presentations: Why Bottom Bouncers and Jigs Aren't Always the Answer
While a classic jig-and-minnow or a bottom bouncer with a crawler harness are absolutely essential tools in a Minnesota walleye angler's arsenal, they have their limitations. Jigs rely on a certain amount of horizontal movement or aggressive vertical hopping to trigger strikes. If walleye are tight-lipped, a jig might seem too aggressive or move too fast past their strike zone.
Bottom bouncers, while great for covering water and presenting live bait, are designed to drag or bounce along the bottom. This is fantastic when walleye are actively feeding on the lakebed. However, when fish are suspended, or if the bottom is exceptionally snaggy with thick weeds or sharp rocks, a bottom bouncer can become more of a snag magnet than a fish catcher. We've all lost a few expensive rigs to the depths of a rocky reef on a lake like Leech Lake, haven't we? It’s these specific scenarios that really highlight the need for a more adaptable technique.
The Drop-Shot Advantage: A Finesse Approach for Walleye
When those walleye get stubborn, you need to adapt. That's where the drop-shot rig truly shines. It’s a technique often associated with bass fishing, but it has proven to be incredibly effective for walleye, especially in pressured waters or during tough bites. It allows for an incredibly natural presentation that can entice even the most reluctant fish.
What Makes Drop-Shotting So Effective for Walleye?
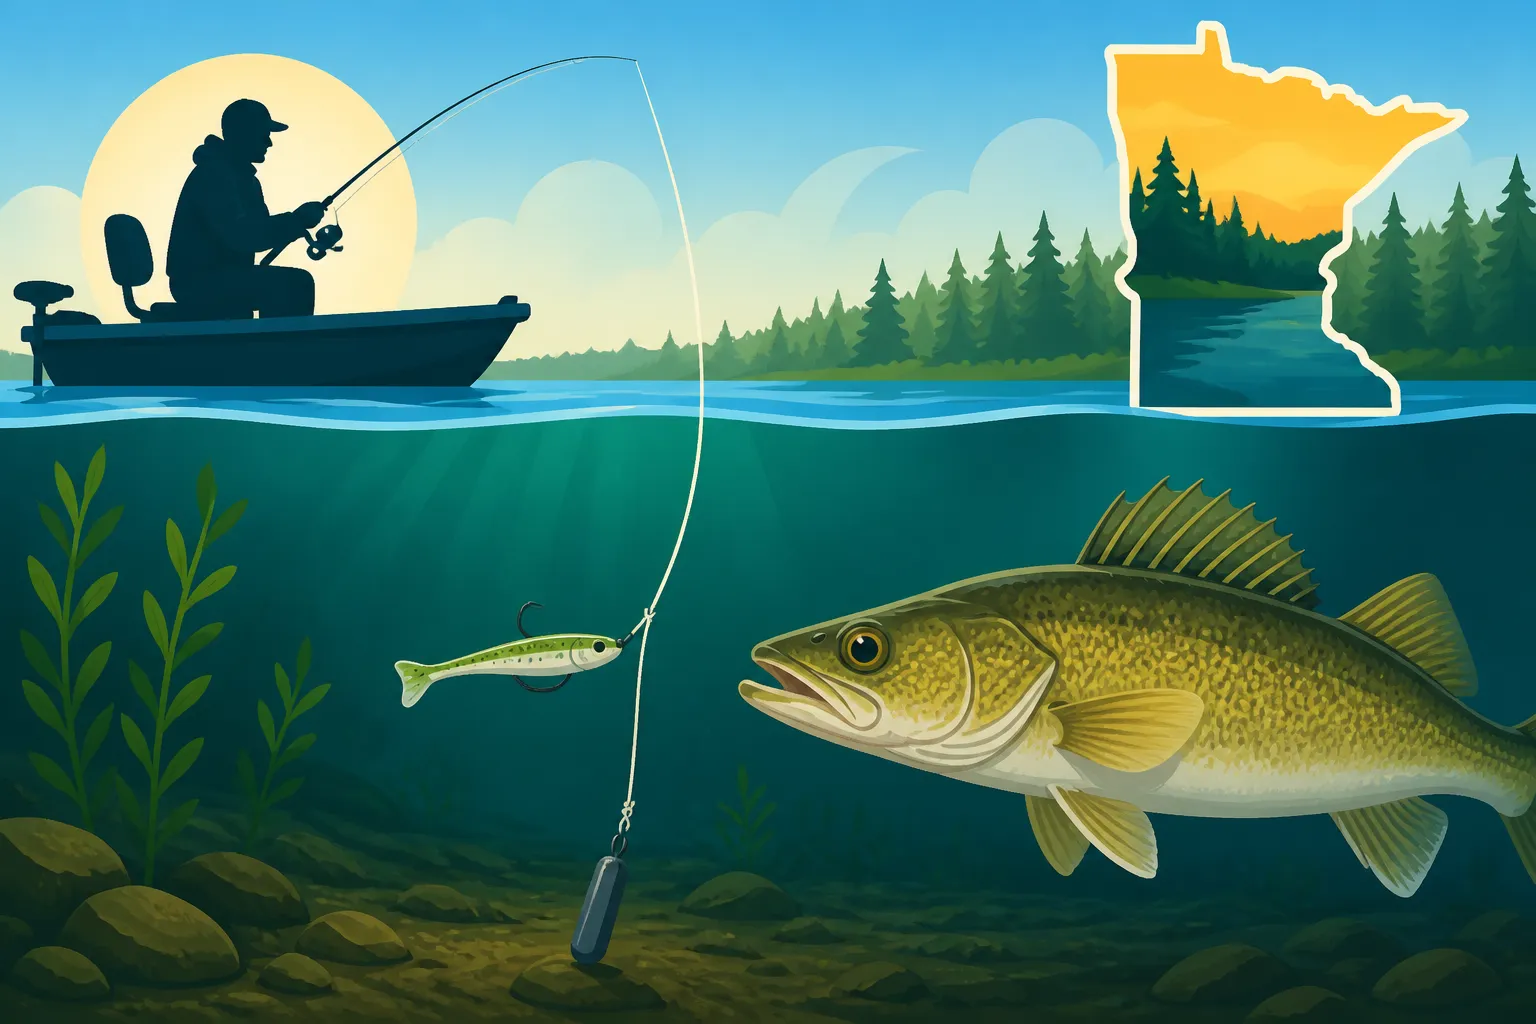
The beauty of the drop-shot lies in its unique design. The weight is at the very bottom of your line, and the hook is tied directly to the main line a foot or two above the weight. This setup offers several critical advantages for walleye fishing:
First, it provides an incredibly natural bait presentation. Your minnow, leech, or soft plastic isn't dragging on the bottom; it's suspended tantalizingly at a precise depth, often right at eye level for the walleye you're marking. The bait can quiver and move with the slightest twitch of the rod, mimicking a struggling baitfish or insect without any unnatural drag from the weight. This subtle action is often exactly what a finicky walleye needs to commit.
Second, it offers unparalleled depth control. You can rig your hook anywhere from six inches to five feet or more above the weight, allowing you to perfectly target fish suspended at various depths. If your fish finder shows walleye five feet off the bottom, you can easily set your hook five feet above your weight and keep your bait right in their face. This precision is a game-changer when fish are holding tight to a specific depth. For more general tactics, you might want to review our comprehensive guide on Walleye Fishing Techniques Complete Minnesota Guide to see how drop-shotting fits into the broader picture.
Finally, it enhances bite detection. Because the weight is separate from the hook, you feel every subtle tap, every slight weightlessness, directly through your line. The weight keeps your line taut, transmitting even the lightest "inhale" bite that walleye are famous for. It's a truly sensitive setup that allows you to feel what's happening hundreds of feet below the surface.
Key Components of a Walleye Drop-Shot Rig
Building an effective drop-shot rig for walleye means paying attention to a few key pieces of gear. You don't need overly heavy tackle; finesse is the name of the game here. You'll find many of these items readily available from retailers like Amazon, making it easy to gather your components.
- Rod: A medium-light to medium power spinning rod, typically 6'6" to 7'6" in length, with a fast or extra-fast action is ideal. The sensitive tip allows for excellent bite detection, while the backbone helps with solid hooksets. Think of a rod that can handle light line but still has enough power to manage a good-sized walleye. Many anglers prefer something like a St. Croix Eyecon series rod or a Fenwick HMG. If you're looking to upgrade your setup, explore our recommendations for the Best Walleye Rods & Reels.
- Reel: A lightweight spinning reel in the 1000-2500 size range balances well with the sensitive rod. Smooth drag is crucial, as you'll often be using lighter line. Shimano Sedona or Pflueger President reels are popular choices that offer excellent performance without breaking the bank. For more options, check out our guide on Best Spinning Reels for Walleye.
- Line: This is critical. Most drop-shotters use a low-stretch main line, like braided line (6-10 lb test), with a fluorocarbon leader (6-10 lb test). The braid provides maximum sensitivity and casting distance, while the fluorocarbon leader offers invisibility underwater and abrasion resistance. A knot like the Double Uni or Alberto knot can be used to connect the braid to the fluoro leader. Understanding the nuances of line choices can significantly impact your success; our guide on Best Fishing Line for Walleye Braid vs Mono vs Fluoro delves deeper into this.
- Hook: Special drop-shot hooks are available, often with a wider gap, designed to keep your bait horizontal. Size 1 to 2/0 Octopus hooks or Gamakatsu Split Shot/Drop Shot hooks work wonderfully. You want a hook that's sharp and strong enough to handle a walleye but light enough not to impede the bait's natural action.
- Weight: This is where the "drop" in drop-shot comes from. Tungsten or lead pencil-style weights, cylindrical weights, or tear-drop weights are common. They typically range from 1/8 oz to 1/2 oz, depending on depth and current. The key is to use a weight that allows for quick unhooking from snags without having to retie your entire rig. Many drop-shot weights have a line clip rather than a tie-in eye, allowing you to easily adjust the distance between your hook and weight, or to lose just the weight if you snag up.
Assembling Your Walleye Drop-Shot Rig Step-by-Step
Putting together a drop-shot rig isn't complicated, but getting the details right can make all the difference. It's about precision and understanding how each component works together to present your bait perfectly to those wary walleye.
Tying the Palomar Knot and Setting Your Leader Length
The Palomar knot is arguably the most popular and strongest knot for tying a hook to a drop-shot rig. Here's a quick rundown on how to do it:
- Double the Line: Take about a foot or two of your fluorocarbon leader and double it over, creating a loop. Pass this loop through the eye of your hook.
- Overhand Knot: Tie a simple overhand knot, making sure the hook hangs loosely in the center of the loop. Do not tighten it yet.
- Pass Hook Through Loop: Take the large loop you just created and pass the hook back through it. This is the crucial step that creates the "standing" hook.
- Moisten and Pull Tight: Moisten the knot with saliva and pull both ends of the line (the tag end and the main line) simultaneously to cinch the knot down firmly against the eye of the hook.
- Orient the Hook: Now, here's the trick for drop-shotting: take the tag end of your line and pass it back through the eye of the hook from the top down. This will make your hook stand out perpendicularly from the main line, ensuring your bait presents horizontally.
- Set Leader Length: Your leader length will depend on how high you want your bait off the bottom. If you're fishing shallow weeds and want your bait just above them, a 6-12 inch tag end might be perfect. If fish are suspended 3-5 feet off a deep ledge, you'll need a longer tag end. Cut your tag end to the desired length where you'll attach your weight.
Don't be afraid to experiment with leader lengths. On some days, a walleye might want the bait just inches off the bottom; on others, it might be suspended several feet up. This adjustability is one of the drop-shot's greatest strengths.
Attaching Your Weight and Hook
Once your hook is tied, the rest of the rig comes together quickly.
- Attaching the Weight: The beauty of specialized drop-shot weights is often their line-clipping mechanism. Instead of tying a knot, you simply thread your tag end through the small wire clip at the top of the weight and pull it tight. This allows for quick adjustments of bait height and, more importantly, if your weight snags, you can often pull it free without losing your entire hook and bait. If you're using a standard eyelet weight, tie it on with a simple Uni knot or improved clinch knot. Remember, the goal is often to lose just the weight if you get stuck, so sometimes tying a slightly weaker knot here isn't a bad idea, or simply using the clip-on weights.
- Hook Style and Orientation: While the Palomar knot with the tag end through the hook eye ensures your hook stands out, the choice of hook style also matters. Octopus hooks are excellent as they have a slightly turned-up eye, which helps them present horizontally. Wide-gap hooks can also work well, especially for larger soft plastics. The key is to ensure your bait isn't hanging vertically like a dead stick but rather hovering horizontally, free to move naturally.
Choosing the Right Bait: Live Bait vs. Artificials
The drop-shot rig is incredibly versatile when it comes to bait, and both live bait and artificials have their place, depending on the conditions and the fish's mood.
-
Live Bait: For walleye, live bait is often king, and the drop-shot allows you to present it exquisitely.
- Minnows: Hooked lightly through the nose or just behind the dorsal fin, a shiner, fathead, or rainbow chub will swim naturally, attracting attention without excessive movement. This is particularly effective on lakes like Lake of the Woods where large shiners are a common forage. For tips on sourcing and keeping bait, check out our guide on Best Live Bait for Walleye Leeches, Minnows, Crawlers.
- Leeches: A medium to large leech hooked once through the sucker end or the nose will wiggle enticingly. Leeches are incredibly durable and remain active for a long time, making them a superb choice for a subtle presentation.
- Nightcrawlers: A half or full nightcrawler threaded onto the hook, leaving a juicy tail to flutter, can be irresistible. This is often a go-to when walleye are feeding heavily on invertebrates.
-
Artificial Baits: Don't underestimate the power of plastics, especially when you want to avoid bait costs or constantly re-bait. Many modern soft plastics are designed to mimic live bait so effectively that they often outperform the real thing.
- Soft Plastics: Small finesse worms (4-6 inches), minnow imitations (like a Berkley Gulp! Minnow or a Z-Man MinnowZ), or small grub tails are all excellent choices. Colors like natural baitfish (shad, silver), emerald shiner, or even chartreuse and glow can be very effective. Scented plastics, in particular, can be a huge advantage when fish are hesitant. Experiment with various brands like Amazon offers a wide selection from Strike King, Gary Yamamoto, and more.
- Rigging Plastics: For plastics, usually nose-hooking them with just the tip of the hook is best. This allows the body of the plastic to flutter and move freely, maximizing its action. Sometimes, Texas-rigging a small worm can be effective in heavier cover, though it slightly reduces the natural dangle.
Mastering the Presentation: How to Fish a Drop-Shot for Walleye
Now that you've got your rig tied and your bait selected, it's time to put it to work. Fishing a drop-shot for walleye is a game of subtle movements and paying close attention to what your line and rod are telling you. It's less about aggressive jigging and more about finesse. If you want to refine your overall walleye strategy, our article How to Catch Walleye in Minnesota Step by Step provides a broader perspective.
Vertical Jigging and Drifting Techniques
The most common ways to fish a drop-shot for walleye involve either a vertical presentation or a slow drift.
-
Vertical Presentation (Hovering): This is ideal when you've pinpointed a small school of walleye on your electronics, or you're targeting a specific piece of structure like a submerged rock pile or a transition line.
- Drop to Bottom: Lower your rig directly below your boat until you feel the weight hit the bottom. Take up any slack.
- Raise to Desired Height: Slowly reel up just enough line to lift the weight a few inches off the bottom, or to the desired height where you're marking fish. Your bait should be suspended naturally at the pre-determined distance above the weight.
- Subtle Action: From here, the movements should be minimal. Gently shake your rod tip, causing your bait to quiver without moving the weight much. You can also lift the weight a foot or so and let it settle back down. The goal is to make the bait look alive and vulnerable.
- Hold and Wait: Often, the most effective technique is to simply hold the bait perfectly still for several seconds. Many walleye will strike a motionless bait when they wouldn't touch a moving one. This quiet approach is particularly useful during the day on clear lakes. For specific tips on various walleye strategies, check out Best Walleye Fishing Tactics in Minnesota.
-
Drifting Technique: When walleye are more scattered or you're trying to cover a wider area, drifting with a drop-shot can be deadly.
- Longer Leader: Consider a slightly longer leader (2-3 feet) between your hook and weight for drifting, allowing your bait more freedom of movement.
- Maintain Verticality: As your boat drifts (either with wind or a trolling motor on low), try to keep your line as vertical as possible. This means constantly adjusting your retrieve speed or letting out a little line to ensure your weight occasionally taps the bottom.
- Drag and Lift: Let the weight drag along the bottom for a bit, then lift it a foot or two, let it settle, and repeat. The subtle action of the bait being lifted and then allowed to flutter down can trigger strikes. This technique is often effective when walleye are keying in on deeper structure during summer patterns, as discussed in Summer Walleye Patterns Deep Structure.
Reading Your Electronics and Identifying Prime Spots
Your fish finder is your best friend when drop-shotting for walleye. This technique is all about precision, and you can't be precise if you don't know exactly where the fish are.
- Locating Fish: Use your sonar (traditional 2D, side imaging, or even forward-facing like Garmin LiveScope) to locate schools of baitfish, individual walleye, and key structural elements. Look for those tell-tale arches or dots suspended off the bottom, or groups of fish hugging specific contours. Brands like Humminbird and Lowrance offer excellent electronics that make this easy.
- Targeting Structure: Drop-shotting excels around complex structure. Think rock piles, submerged timber, sharp breaklines, humps, and even the edges of weed beds. Walleye will often position themselves in these areas, slightly elevated from the bottom, waiting to ambush prey. Your ability to present a bait directly into these tight zones, without snagging, is where the drop-shot truly shines.
- Waypoint Marking: Once you find a productive spot or a school of fish, mark a waypoint immediately. This allows you to return to the precise location and work it thoroughly. For a deeper dive into optimizing your electronics, our guide How to Catch More Fish With a Fish Finder is an excellent resource.
Detecting Bites and Setting the Hook
Drop-shot bites can be incredibly subtle, often feeling like nothing more than a slight increase in pressure, a tiny tap, or even just a feeling of "mushiness" or slack in the line. This is where the sensitivity of your braided main line and fast-action rod tip really comes into play.
- Constant Contact: Always maintain slight tension on your line. You don't want a bowed line that dampens sensitivity. Your rod tip should be slightly bent, ready to transmit any unusual sensations.
- The Tell-Tale Signs:
- Tap, Tap, Tap: The most obvious bite is a series of light taps. This usually means a walleye is mouthing the bait.
- Weightlessness: Sometimes, the line will go slack, or you'll feel like your weight has suddenly become lighter. This often means a walleye has picked up the bait and is moving towards you or simply holding it in its mouth.
- Increased Pressure: A slow, steady pull or an increase in pressure on the line often indicates a fish has taken the bait and is swimming away.
- Setting the Hook: Unlike a jig where you might use a powerful sweep, drop-shot hooksets are more refined. When you feel a bite, don't rear back like you're trying to set the hook on a muskie. Instead, simply reel down quickly to take up any slack, lift your rod tip smoothly but firmly, and maintain steady pressure. The sharp, exposed hook of a drop-shot rig often sets itself with minimal effort. Keeping the rod loaded after the hookset helps absorb the initial runs of a feisty walleye.
Mastering this technique takes practice, but the rewards are well worth it, especially when other methods are failing. It's about patience, observation, and a willingness to adapt your approach to match the mood of those sometimes-stubborn Minnesota walleye.
| Bait Type | Pros | Cons | Ideal Conditions |
|---|---|---|---|
| Live Minnows | Natural action, proven walleye attractor, scent | Can be delicate, need frequent re-baiting, cost, bait care | Finicky fish, clear water, slow bite, anytime walleye are present |
| Live Leeches | Durable, active, good scent trail, long lasting | Can be slow to attach, less erratic action than minnows | Cooler water, moderate bite, persistent fish |
| Nightcrawlers | Good scent, readily available, visual appeal | Can be torn easily, less natural movement than leeches/minnows | Warm water, active fish, after rains, river fishing |
| Soft Plastics | Durable, variety of shapes/colors, cost-effective | Lacks natural scent (unless scented), sometimes less enticing | Aggressive fish, covering water, specific forage imitation, faster techniques |
Disclaimer
Fishing regulations, seasons, and limits can change frequently. Always consult the most current Minnesota Department of Natural Resources (DNR) fishing regulations booklet or website before heading out on the water. This guide is for informational purposes only and does not supersede official regulations.