Best Ice Fishing Electronics for Beginners
Stepping onto the frozen expanse of a Minnesota lake for the first time can be exhilarating, but also incredibly daunting when you see seasoned anglers surrounded by an array of gadgets. It’s easy to feel overwhelmed, wondering if you need all that fancy gear just to catch a few fish. This guide is designed to cut through the noise, helping beginner ice anglers understand which electronics truly make a difference, how they work, and how to choose the best options without breaking the bank.
Why Electronics Matter on the Ice Even for Beginners
For many of us, ice fishing began with a spud bar, a scoop, and a bobber. And honestly, there's nothing wrong with that! It's how many of us learned the basics and developed a love for the sport. But let's be real: modern ice fishing electronics aren't just for the pros anymore. They've become accessible tools that can dramatically improve your success and enjoyment, even if you're just starting out. They take a lot of the guesswork out of what's happening under your feet.
The Frustration of Blind Fishing
Remember those days, or maybe you're living them right now, where you drill a hole, drop a line, and just… wait? You have no idea if there's anything down there. Is your bait even at the right depth? Are fish swimming by without even noticing your offering? It's like fishing in the dark, and it can be incredibly frustrating. You spend hours, maybe even an entire weekend, sitting on a bucket, freezing, with nothing to show for it but numb fingers and a deflated spirit. This "blind fishing" approach can quickly lead to burnout, especially when you see others around you consistently pulling fish through the ice.
The mental game of ice fishing is huge. When you're constantly second-guessing your spot or your presentation because you can't see what's happening, it wears on you. You might pack up early, convinced the fish just aren't biting, when in reality, they were there, just a few feet deeper or shallower than your bait. This lack of feedback is a major hurdle for new anglers trying to develop their skills and confidence. Without some insight into the underwater world, every decision feels like a shot in the dark, making it hard to learn from your experiences.
Gaining Confidence and Efficiency
This is where electronics truly shine, transforming that frustrating guessing game into an informed strategy. Imagine dropping your lure down and instantly seeing it on a screen, along with the bottom, and any fish swimming nearby. You can adjust your depth, jigging motion, and even your bait choice based on real-time feedback. This immediate understanding of the underwater environment builds immense confidence. You know if fish are present, how they're reacting to your bait, and when to make adjustments. It's like having a superpower, letting you "see" through the ice.
Beyond confidence, electronics make your time on the ice far more efficient. Instead of drilling a dozen holes and waiting passively, you can quickly assess a spot. If there are no fish, move on. If there are fish, you can fine-tune your presentation until they bite. This means less wasted time and more actual fishing action. For a beginner, this efficiency translates directly into more catches, which is a massive motivator to keep coming back to the ice. It truly helps you shorten the learning curve, turning those long, cold waits into exciting, active fishing sessions.
Essential Ice Fishing Electronics for Newbies
Alright, so you're convinced that electronics can help. But what do you actually need? The market is flooded with options, from simple flashers to advanced live-imaging sonar. For a beginner, it’s best to start with the foundational tools that offer the most bang for your buck and are relatively easy to learn. You don't need all the bells and whistles right away; focus on the core capabilities that will put more fish on the ice.
Flashers: Your Real-Time Window Below
If there's one piece of ice fishing electronics every serious beginner should consider, it's a flasher. These devices are the workhorses of the ice fishing world, providing a real-time, instantaneous display of what's happening directly below your hole. They might look a bit old-school with their circular, flashing lights, but don't let that fool you. They are incredibly effective at showing your lure, the bottom, and any fish that enter the transducer's cone.
The beauty of a flasher lies in its simplicity and responsiveness. You drop your bait, and you see it instantly. A fish swims by, and boom, you see it. This immediate feedback loop is invaluable for learning how fish react to different jigging styles and depths. You can literally watch a fish approach your bait, see if it's interested, and adjust your presentation to entice a bite. It turns a passive activity into an interactive video game. Popular models like the Vexilar FLX-28 or the Humminbird Ice Helix series are fantastic starting points, offering reliable performance without being overly complicated. For more depth on these, check out our guide on the "Best Ice Fishing Flashers: Vexilar vs Humminbird vs Garmin".
Basic GPS Units or Smartphone Apps
While a flasher helps you see fish under your hole, a GPS helps you find the right holes in the first place. Knowing where you are on the lake, where productive spots are, and how to get back to them is critical. Losing your way on a vast, featureless frozen lake, especially as weather rolls in, is a real concern. A basic GPS unit or, more commonly and accessibly for beginners, a smartphone with a reliable mapping app, is essential for navigation and finding prime fishing real estate.
Many modern smartphones have excellent GPS capabilities, and apps like Navionics, LakeMaster (via Humminbird devices or their app), or Fishbrain offer detailed lake maps showing contours, drop-offs, humps, and submerged structure – all key areas where fish like to hang out. You can mark waypoints for productive spots, follow existing tracks, and safely navigate back to shore. This prevents you from wasting precious fishing time drilling random holes in barren areas. Plus, having a map allows you to target specific species, like looking for shallow weeds for panfish or deep breaks for walleye. Our post on "Best Fishing Apps for Minnesota (Fishbrain, Navionics)" offers more insights into leveraging these tools.
Underwater Cameras for Visual Confirmation
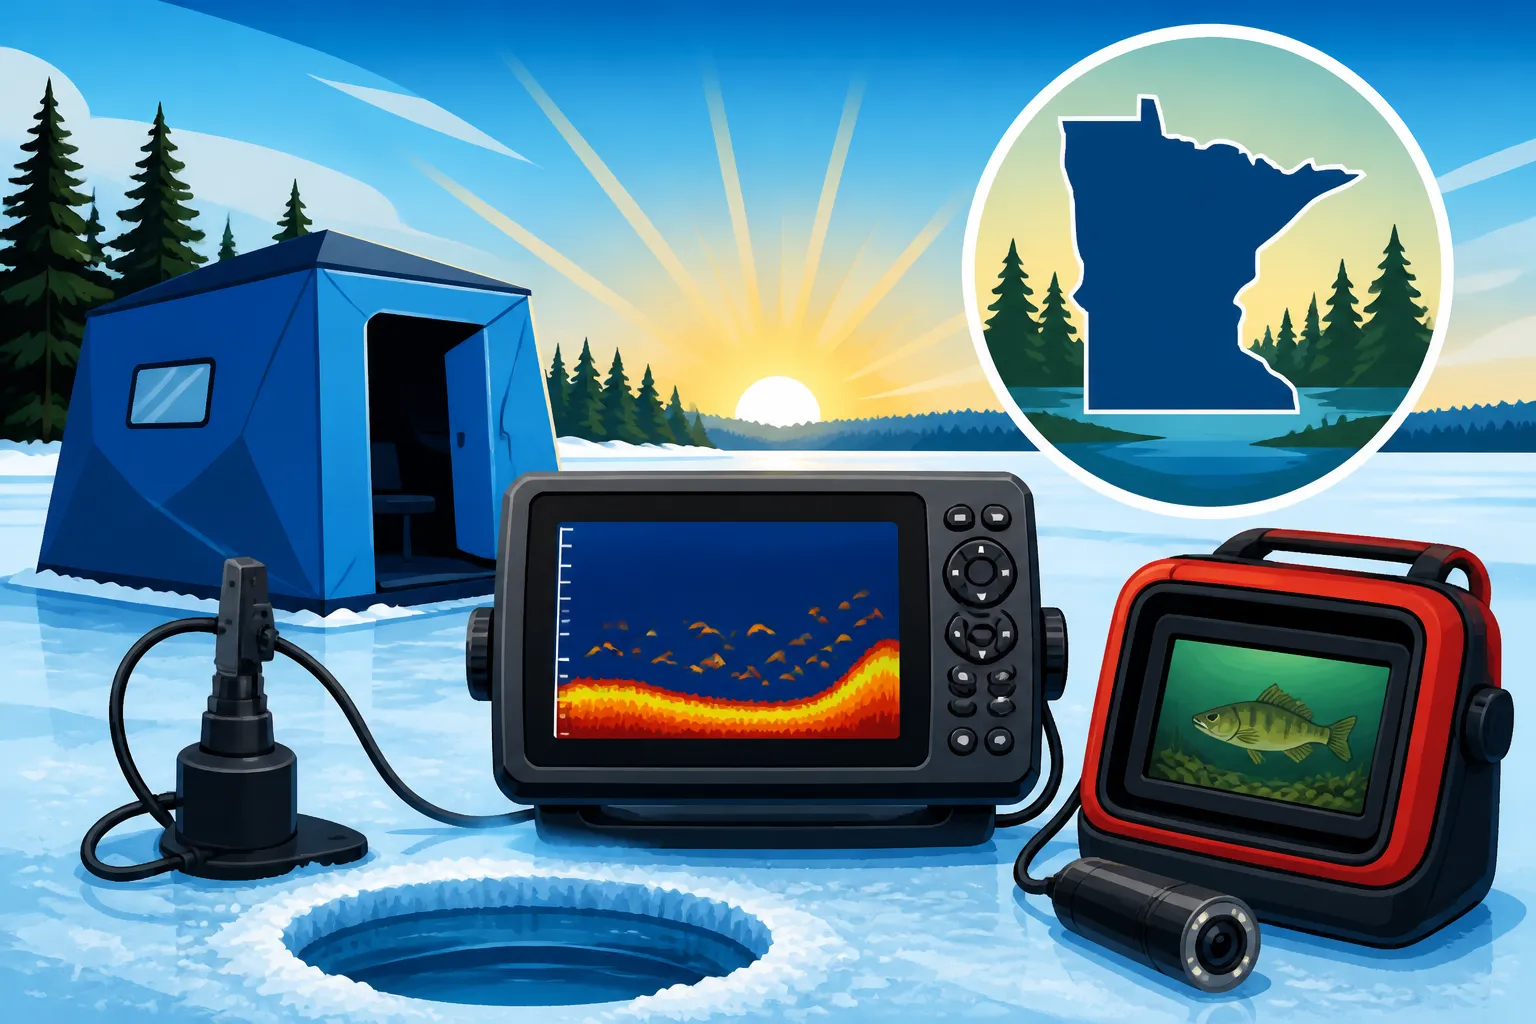
Now, a flasher gives you a line on a screen, and GPS tells you where to be. But what if you want to see the fish and your bait? That's where an underwater camera comes in. While perhaps not as "essential" as a flasher or GPS for finding fish, a camera provides an incredible learning experience and a huge confidence boost, especially for new anglers. It lets you confirm exactly what species is down there, how big it is, and exactly how it's reacting to your lure.
Imagine seeing a big walleye casually inspect your jig, or a school of crappies darting around your minnow. This visual confirmation is incredibly powerful for understanding fish behavior and refining your technique. It's also just plain fun to watch! For beginners, a simple, affordable camera like those from Aqua-Vu or MarCum can provide clear images and help you identify fish that might just be "ghosts" on a flasher. You might realize those faint blips on your flasher were actually small baitfish, not the jumbo perch you were hoping for. It’s an amazing educational tool, bringing the underwater world right to your fingertips.
Diving Deeper into Flashers The Beginner's MVP
When you're just starting out on the ice, the sheer volume of gear can be overwhelming. But if you ask almost any seasoned Minnesota ice angler what their single most important electronic device is, nine times out of ten they’ll point to their flasher. It’s the closest thing you’ll get to actually seeing underwater in real-time, giving you an immediate advantage over simply dropping a line and hoping for the best.
How Flashers Work Simple Terms
At its core, a flasher is a sonar device that sends out sound waves from a transducer, bounces them off objects (like fish, your lure, or the bottom), and then displays the returning echoes on a circular screen. Think of it like a radar for fish. The unit emits a pulse, and that pulse travels down through the water column. When it hits something – your jig, a fish, or the lakebed – it bounces back up to the transducer. The flasher measures how long it took for the sound wave to return, and based on that, it calculates the depth of the object.
The magic happens on the display. The screen is a circular dial with lights that illuminate around it. The zero mark is the surface, and as you go clockwise, the depth increases. Your lure will show up as a colored line, typically green, yellow, or red depending on its signal strength. Fish will appear as colored marks, also indicating their size and proximity to your transducer. The bottom of the lake is usually a wider, solid band. What's crucial is that it's all happening in real-time, literally as the sound waves hit and return. This instantaneous feedback allows you to react immediately to fish movement, making it incredibly effective for active jigging.
Key Features to Look For Budget-Friendly
For a beginner, you don't need a flasher with every imaginable feature. Focus on the core functionalities that will help you catch fish and understand what's happening below. First and foremost, look for clear, easy-to-read displays. Some flashers have analog dials, while others have digital screens that mimic the flasher display. Both work great, but personal preference plays a role. Good target separation is crucial; this means the flasher can distinguish between your lure and a fish very close to it. You don't want your jig to disappear into a fish mark!
Adjustable zoom is another highly beneficial feature, allowing you to magnify a specific depth range (e.g., the bottom 5 or 10 feet) for more precise lure and fish detection. This is particularly useful when fishing very close to the bottom for walleye or perch. Lastly, consider battery life and portability. You want a unit that will last all day on the ice and is easy to transport from hole to hole. Many entry-level units come in durable cases that protect the screen and battery, making them perfect for trekking across a frozen lake. You can often find great beginner options at places like Bass Pro Shops or on Amazon.
Popular Beginner-Friendly Flasher Models
When it comes to beginner-friendly flashers, a few brands consistently rise to the top for their reliability and ease of use. Vexilar, Humminbird, and MarCum are the major players in this space, and they all offer excellent entry-level options.
- Vexilar FL-8SE: This is often considered the classic beginner flasher. It's incredibly robust, simple to operate, and provides a clear, reliable display. It might not have all the bells and whistles of higher-end models, but it does exactly what a flasher is supposed to do, and it does it well. Its reputation for durability is legendary among ice anglers.
- Humminbird Ice 35 or Ice 45: These units offer a step up in features compared to the FL-8SE, often including dual-beam transducers for wider coverage and more power. The digital flasher display on the Ice Helix series, like the Ice Helix 5 Chirp G2, can be very appealing to those who prefer a modern screen, while still giving that classic flasher feel. It’s a great choice if you want to also have traditional sonar capabilities.
- MarCum VX-1i: MarCum is another strong contender, known for its bright, easy-to-see displays and excellent target separation. The VX-1i is a solid entry-level choice that provides clear readings even in bright sunlight. They often come with a larger display than some other base models, which can be a real plus for tired eyes.
Any of these options will serve a beginner well, offering reliable performance without an overly steep learning curve. The key is to pick one, learn it inside and out, and start applying what you see to catch more fish. Remember, our "How to Read a Flasher Vexilar/Humminbird" guide can offer more specific tips once you get your hands on one.
Navigating with GPS and Mapping Finding the Fish
You've got your flasher, you're seeing fish, but what if you're not in the right zip code to begin with? That's where GPS and detailed mapping come into play. While a flasher helps you catch fish under you, GPS helps you put your hole over the fish. It's about strategic positioning, especially on large, unfamiliar bodies of water like Lake of the Woods or Mille Lacs Lake.
Why GPS is Crucial for Ice Anglers
Drilling holes randomly is a surefire way to get cold and discouraged. Fish don't just swim anywhere; they relate to specific structures, depth changes, and forage. A GPS unit or app with detailed lake maps allows you to identify these potential hotspots before you even set foot on the ice. You can pinpoint submerged humps, rock piles, weed lines, and drop-offs – all common holding areas for various fish species. This is crucial for efficient fishing, as it guides you to where the fish are most likely to be, dramatically reducing your "dead time" spent searching.
Beyond finding fish, GPS is a critical safety tool. On vast frozen lakes, whiteout conditions can develop rapidly, and the landscape often looks completely uniform. A reliable GPS ensures you can always find your way back to your vehicle, camp, or ice shelter, preventing dangerous situations. Marking productive holes, hazards, or even a path through treacherous ice becomes second nature. It takes the stress out of navigating, allowing you to focus on fishing. Especially when you're exploring a new lake, like when planning a trip to one of the "Best Fishing Lakes in Minnesota," having reliable navigation is non-negotiable.
Standalone Units vs. Smartphone Apps
When it comes to GPS, you essentially have two main options: a dedicated handheld GPS unit or using your smartphone with a mapping application. Both have their pros and cons for beginners.
- Dedicated GPS Units: These units, often from brands like Garmin or Lowrance, are built to withstand the elements. They usually have physical buttons that are easier to operate with cold, gloved hands, and their batteries are typically designed for extended cold-weather use. They are rugged, waterproof, and often come pre-loaded with detailed lake maps. The downside is the upfront cost and the fact that it's another piece of equipment to buy and carry.
- Smartphone Apps: For many beginners, a smartphone running an app like Navionics Boating or the C-MAP Embark app is the most accessible and cost-effective solution. These apps offer incredibly detailed mapping, often exceeding what comes on basic dedicated units, and can be downloaded for specific regions. Your phone is likely already with you, making it one less device to remember. However, phones can suffer from poor battery life in the cold, and touchscreens can be finicky with gloves. Always carry a portable power bank if relying on your phone for GPS, and consider a waterproof, insulated case to protect it.
Ultimately, either option can be effective. For the absolute beginner on a tight budget, the smartphone app is a great starting point, provided you manage battery life. If you're looking for maximum reliability and durability in harsh conditions, a dedicated unit is a worthwhile investment down the line.
Basic Map Features for Success
When using GPS for ice fishing, there are a few map features that are absolutely vital for finding fish:
- Contour Lines: These lines show changes in depth. Tight contour lines mean steep drop-offs or humps, while widely spaced lines indicate a gradual slope. Fish often relate to these changes, especially at the edges of structure. Look for areas where contours "pinch" together or expand, as these create natural ambush points.
- Depth Shading: Many maps use color shading to highlight different depth ranges, making it easier to visualize shelves, flats, and deep holes at a glance. For example, shallow areas might be light blue, gradually darkening as the water gets deeper. This quickly points out areas that hold certain species.
- Structure and Cover Icons: Look for icons indicating submerged timber, rock piles, weed beds, or even old roadbeds. These are magnets for fish. Knowing that there's a submerged brush pile at 15 feet might lead you to drill a hole right on top of it, increasing your chances for crappies or bass.
- Waypoint Marking: The ability to mark and save specific locations is invaluable. When you find a productive hole, mark it! When you see fish on your flasher, mark that spot. This builds a personal library of hotspots over time, making future trips more successful. You can also mark hazards, access points, or even where you parked your vehicle. Our article on "Ice Fishing in Minnesota: Complete Beginner-to-Pro Guide" emphasizes how crucial this navigation aspect is for overall success.
The Fun Factor: Underwater Cameras
While flashers and GPS are your workhorses, an underwater camera is arguably the most exciting piece of electronics for many ice anglers, especially beginners. It adds a whole new dimension to ice fishing, bringing the hidden world beneath the ice to vivid life. It's not just about catching fish; it's about observing, learning, and sharing the experience.
Seeing is Believing: When to Use a Camera
An underwater camera serves several fantastic purposes. First, it's an incredible teaching tool. You can literally watch how fish react to your lure. Are they ignoring it? Are they spooking? Are they nudging it but not biting? This visual feedback helps you adjust your jigging cadence, lure size, or color in real-time. It’s like having an underwater fishing coach. For example, you might see a walleye approach your jig, then flare its fins and back away. That tells you something about your presentation, whereas a flasher would just show a fish disappearing.
Secondly, cameras are amazing for identifying species and size. Sometimes a flasher will show a "fish arc," but you don't know if it's a trophy walleye or a small perch. A camera provides undeniable confirmation. This is especially useful in lakes with specific slot limits or when targeting specific species. It’s also invaluable for ice fishing for Crappie & Panfish, as you can see precisely how they are schooled and how they react to different baits. Lastly, it’s just pure entertainment! Watching fish interact with their environment, seeing other schools of fish swim by, or even observing curious panfish nibble at your bait, adds an element of wonder to every trip, making the experience more engaging and memorable, especially for kids.
Simple Models for First-Timers
You don't need a high-definition, pan-and-tilt camera rig to get started. Many affordable, entry-level underwater cameras offer excellent performance for beginners. Look for units that are easy to deploy, have decent screen size and resolution, and offer good battery life.
- Aqua-Vu Micro Series: Aqua-Vu is a leader in underwater cameras, and their Micro series is perfect for beginners. They are compact, fit in your pocket, and often feature a small but clear color screen. They're incredibly user-friendly; just drop the camera, turn it on, and watch. Some models even allow you to record video.
- MarCum Recon Series: Similar to Aqua-Vu, MarCum offers portable and user-friendly camera systems. The Recon series is designed for portability and ease of use, providing clear images even in low-light conditions thanks to built-in IR lighting (though color is better for general viewing). They are rugged and often come with a small, self-contained display.
These simpler models focus on providing a clear view below your hole without added complexities. They're typically easy to set up, operate, and pack away, making them ideal for casual trips or as a secondary tool alongside your flasher.
Pairing with Other Electronics
An underwater camera truly shines when used in conjunction with your flasher. Think of it as a one-two punch. Your flasher is the primary search tool: you use it to identify fish and their depth. Once you see activity, you can deploy your camera to get a visual. This combination confirms what you're seeing on the flasher. For example, if your flasher shows a fish hugging the bottom, drop the camera to see if it's a bottom-feeding species like a burbot or a larger walleye.
This pairing is also fantastic for troubleshooting. If fish are showing up on your flasher but not biting, the camera can reveal why. Maybe your lure is too big, too small, or your jigging motion is all wrong. Perhaps the fish are just curious window-shoppers, or they’re spitting the hook before you can feel them. This synergistic approach maximizes your understanding of the underwater world and allows for real-time adjustments that significantly increase your chances of success. It's a powerhouse combination for any beginner eager to learn and catch more fish.
Setting Up Your First Electronic Kit Tips and Tricks
So, you're ready to dive into the world of ice fishing electronics. That's fantastic! But how do you actually get started without feeling completely overwhelmed, or worse, spending a fortune on gear you don't really need yet? The key is to be strategic, prioritize, and most importantly, get out on the ice and start learning.
Prioritizing Your Purchases
For a true beginner, the best approach is to start with the most impactful piece of gear and build from there.
- Flasher First: Hands down, your first major investment should be a quality entry-level flasher. It gives you real-time feedback on fish, your lure, and the bottom, which is fundamental to learning and adapting. It's your eyes under the ice. You can find solid options for under $300-$400, often at places like Bass Pro Shops or through online retailers like Amazon. This will be the most transformative purchase for your success. Look for a Vexilar FL-8SE, a Humminbird Ice 35, or a MarCum VX-1i. For more specific recommendations, our guide on "Best Ice Fishing Electronics for Beginners" or "Best Ice Fishing Gear for Minnesota (2026 Guide)" would be excellent follow-ups.
- GPS/Mapping App Second: Next, focus on navigation. If you have a smartphone, downloading a premium mapping app like Navionics is incredibly cost-effective. If you prefer a dedicated unit, a basic handheld GPS like a Garmin eTrex is a good, rugged starting point. This ensures you can find productive spots and, crucially, find your way back safely.
- Underwater Camera Third (Optional but Recommended): While not strictly necessary for catching fish, an entry-level underwater camera offers unparalleled educational value and sheer enjoyment. It helps confirm what your flasher is showing and reveals subtle fish behaviors. Budget for another $100-$200 for a basic model.
Remember, you don't have to buy everything at once. Start with the flasher, master it, and then add other tools as your confidence and budget allow.
Learning the Ropes and Practicing
Buying the gear is only half the battle; learning how to use it effectively is where the real magic happens. Don't expect to be an expert on your first outing.
- Read the Manual (Seriously!): I know, I know, it's boring, but the manual will explain the basics of your flasher, GPS, or camera. It covers crucial settings and troubleshooting.
- Practice in Clear Water: If you can, take your flasher out to a dock or even a clear swimming area before the ice sets in. Drop your transducer in and play with the settings, observing how your lure appears, how fish react (if any are around), and how the bottom is displayed. This low-pressure environment helps you get comfortable.
- Start Simple on the Ice: On your first few ice trips with electronics, focus on one thing at a time. With your flasher, concentrate on identifying your lure and the bottom. Then, try to pick out fish marks. Practice different jigging styles and watch how your lure moves on the screen. Don't worry about catching fish initially; focus on understanding the electronics. Our "How to Jig for Walleye From a Boat" or "Jigging for Walleye: Jig & Minnow Basics" guides, while not exclusively ice fishing focused, offer general jigging principles that can be adapted.
- Watch Others and Ask Questions: Don't be afraid to talk to other anglers on the ice. Most are more than happy to share tips, especially when they see you making an effort. Many seasoned anglers learned from someone else and are happy to pay it forward.
- Online Resources: YouTube is a treasure trove of tutorials. Search for videos specific to your flasher model or general "how-to" guides for ice fishing electronics. You'll find countless demonstrations and tips from experienced anglers.
Essential Accessories
To make your electronic setup truly functional on the ice, don't forget these crucial accessories:
- Portable Power Bank: Absolutely vital if you're relying on your smartphone for GPS. Cold weather drains phone batteries rapidly. A good quality, high-capacity power bank will be your best friend.
- Extra Batteries for Dedicated Units: If you have a dedicated flasher or GPS unit, always carry a spare charged battery. You don't want to run out of juice just when the fish start biting.
- Tackle Box or Bag: Keep all your electronic components, wires, and accessories organized and protected in a dedicated tackle box or soft-sided bag. This prevents damage and ensures you always know where everything is.
- Transducer Float/Arm: Most flashers come with a foam float or a simple arm to suspend the transducer correctly in the hole. Make sure yours is set up properly for optimal readings.
- Insulated Gloves: While not strictly an electronic accessory, warm, functional gloves are crucial for operating electronics in the cold. Look for gloves that allow enough dexterity to press buttons or swipe a screen.
- Ice Shelter: An ice shelter, even a basic hub style, will protect you and your electronics from the wind and cold, making viewing screens much easier and extending your time on the ice. Consider pairing your electronics with one of the "Best Ice Shelters: Clam vs Otter (Flip vs Hub)".
By starting smart, practicing diligently, and equipping yourself with the right accessories, you'll quickly become proficient with your ice fishing electronics and unlock a whole new level of enjoyment and success on the frozen lakes of Minnesota.
Ice Fishing Electronics for Beginners: A Comparison
To help you visualize the choices, here's a quick comparison of the primary types of ice fishing electronics we've discussed for beginners, highlighting their main benefits and considerations.
| Electronic Type | Primary Benefit | Beginner-Friendly Models | Average Price Range (New) | Key Considerations for Beginners |
|---|---|---|---|---|
| Flasher | Real-time, instant display of fish and lure. | Vexilar FL-8SE, Humminbird Ice 35/45, MarCum VX-1i | $250 – $450 | Essential for active jigging; easy to learn; durable. |
| GPS / Mapping App | Navigation, finding structure, marking hotspots. | Smartphone apps (Navionics), Garmin eTrex, Lowrance Elite | $0 – $300+ (for dedicated) | Crucial for safety and efficiency; manage phone battery. |
| Underwater Camera | Visual confirmation, fish identification, learning. | Aqua-Vu Micro series, MarCum Recon series | $100 – $300 | Educational and fun; great for confirming flasher marks. |
Disclaimer
The information provided in this guide is for general informational purposes only and is not intended as professional advice. Fishing regulations, electronics features, and product availability can change. Always consult the most current Minnesota Department of Natural Resources (DNR) regulations before fishing and check product specifications with manufacturers or retailers. Prices mentioned are estimates and may vary.